
Table of Contents
Introduction
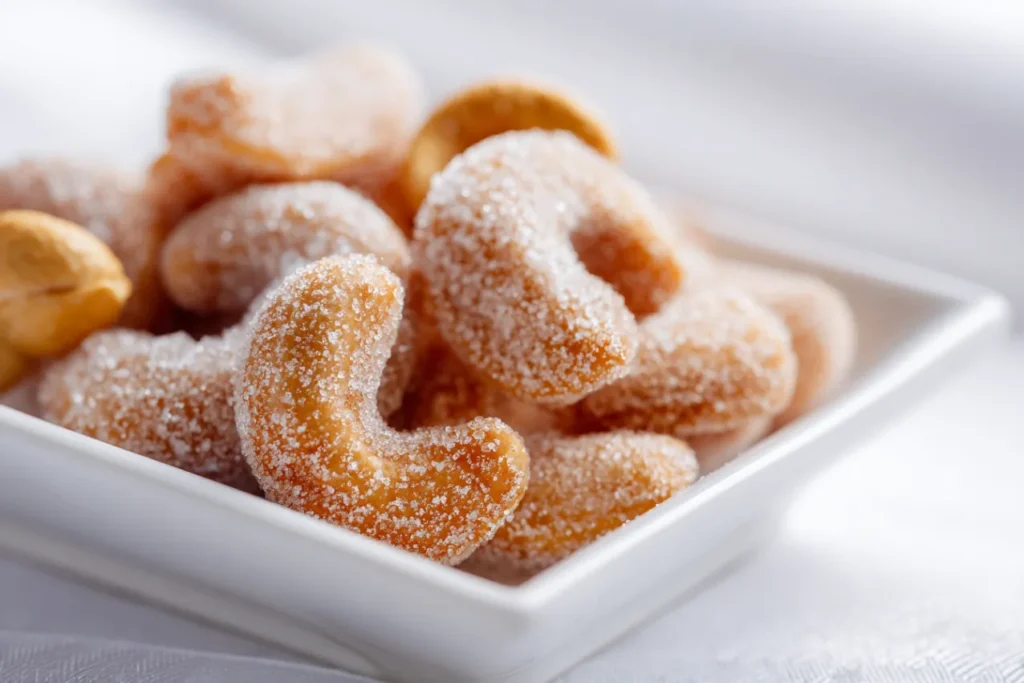
There’s something truly magical about Brazilian sweets, and if you’ve never tried cajuzinho, you’re in for an absolute treat! As someone who’s been making this beloved Brazilian peanut fudge for over a decade, I can tell you that cajuzinho holds a special place in my heart – and once you taste it, it’ll find its way into yours too.
My first encounter with this delightful sweet happened during a trip to Brazil, where a local grandmother shared her family recipe with me. The moment I took my first bite of that perfectly balanced, creamy peanut fudge shaped like a little cashew, I knew I had to master this recipe. Since then, I’ve made countless batches, tweaking and perfecting the technique until I created what my family now calls “the best cajuzinho outside of Brazil.”
In this comprehensive guide, I’ll share everything I’ve learned about making authentic cajuzinho – from selecting the perfect peanuts to achieving that signature smooth texture that makes this Brazilian peanut fudge so irresistible. Whether you’re planning a special celebration or simply want to treat your family to something extraordinary, this recipe will become your new favorite go-to dessert.
Ingredients: The Foundation of Perfect Brazilian Peanut Fudge
Key Ingredients and Their Essential Roles
Creating the perfect cajuzinho starts with understanding each ingredient’s crucial role in this Brazilian peanut fudge masterpiece:
Roasted Peanuts (1 cup): The star of our show! These provide the rich, nutty flavor that defines authentic cajuzinho. I always use unsalted, roasted peanuts because they give you complete control over the final taste.
Sweetened Condensed Milk (395g can): This is the binding agent that creates that signature creamy texture. Brazilian recipes traditionally use leite condensado, and I’ve found that using a full can gives the perfect consistency.
Butter (1 tablespoon): Adds richness and helps prevent the mixture from sticking to your pan. I prefer unsalted butter to maintain flavor balance.
Heavy Cream (1 tablespoon): This little addition makes all the difference in achieving that silky-smooth texture that sets exceptional cajuzinho apart from ordinary versions.
Cocoa Powder (1 tablespoon): Use 100% pure cocoa powder for the best flavor. This adds depth and that beautiful color that makes cajuzinho so visually appealing.
Cinnamon (pinch): A secret ingredient that elevates the flavor profile without overpowering the peanut taste.
White Chocolate (30g): Chopped finely, this melts into the mixture, adding subtle sweetness and extra creaminess.
How to Choose High-Quality Ingredients for Your Brazilian Peanut Fudge
After years of making cajuzinho, I’ve learned that ingredient quality directly impacts the final result. Here’s what I look for:
Peanuts: Choose dry-roasted peanuts with a golden color and no oil residue. Avoid flavored varieties – plain roasted peanuts work best. I often buy raw peanuts and roast them myself in a 350°F oven for 10-12 minutes for maximum freshness.
Condensed Milk: Stick to trusted brands and check expiration dates. The condensed milk should be thick and creamy, not separated or grainy.
Cocoa Powder: Invest in high-quality, unsweetened cocoa powder. Dutch-processed cocoa works wonderfully, but natural cocoa powder is perfectly fine too.
Substitutions That Actually Work (Tested by Experience)
Through countless kitchen experiments, I’ve discovered these reliable substitutions:
- Peanut Allergies: Cashews or almonds work beautifully, though the flavor profile changes slightly
- No Heavy Cream: Whole milk works, but add an extra minute to cooking time
- White Chocolate: Milk chocolate chips can substitute, but reduce by half due to higher sweetness
- No Cocoa Powder: Chocolate powder (like Nesquik) works in a pinch, but reduce by half and skip added sugar
Preparation Steps: Mastering the Art of Brazilian Peanut Fudge
How I Prepare Before Cooking
Successful cajuzinho starts with proper preparation – something I learned the hard way after my first few attempts ended in sticky disasters! Here’s my foolproof pre-cooking routine:
First, I measure all ingredients and have them ready within arm’s reach. Trust me, once you start cooking, you won’t have time to hunt for ingredients. I grind my peanuts to a fine flour consistency – not quite powder, but finer than chopped. This takes about 2-3 minutes in a food processor.
I always use a heavy-bottomed saucepan to prevent hot spots that can burn your cajuzinho. Have a wooden spoon ready, as metal spoons can scratch your pan and don’t distribute heat as evenly.
Step-by-Step Instructions with Professional Tips
Step 1: Create Your Peanut Flour Pulse roasted peanuts in your food processor until you achieve a fine flour consistency. Don’t over-process – you want flour, not peanut butter! If you hear the processor struggling, stop and scrape down the sides.
Step 2: Combine Your Base In your heavy-bottomed saucepan, whisk together cocoa powder, condensed milk, butter, heavy cream, cinnamon, and peanut flour. This initial mixing is crucial – any lumps now will remain in your final product.
Step 3: Cook with Patience Start over low heat, stirring constantly with a wooden spoon. This is where patience pays off! The mixture will gradually thicken over 8-10 minutes. You’ll know it’s ready when you can draw a line through the mixture with your spoon and it holds for 2-3 seconds.
Step 4: The Final Push Increase heat to medium and cook for exactly 4 more minutes, stirring continuously. This step concentrates flavors and achieves the perfect consistency for shaping.
Step 5: White Chocolate Magic Remove from heat and immediately stir in chopped white chocolate. The residual heat will melt it perfectly, creating that luxurious finish.
Step 6: Cool and Set Transfer to a buttered plate and cover with plastic wrap touching the surface to prevent skin formation. Cool for at least 2 hours until firm enough to handle.
Common Mistakes to Avoid (Learned from Real Experience)
After making hundreds of batches, I’ve made every mistake possible! Here are the biggest pitfalls:
Cooking Too Fast: High heat creates a grainy texture. Always start with low heat – patience is your friend.
Under-grinding Peanuts: Chunky peanut pieces create an uneven texture. Aim for fine flour consistency.
Skipping the Plastic Wrap: Without proper covering, your mixture develops a skin that affects shaping.
Wrong Consistency: The mixture should hold its shape when cooled but still be pliable. If too soft, cook longer; if too hard, add a tablespoon of condensed milk next time.
Serving & Final Touches: Perfecting Your Brazilian Peanut Fudge Presentation
Beautiful and Creative Presentation Ideas
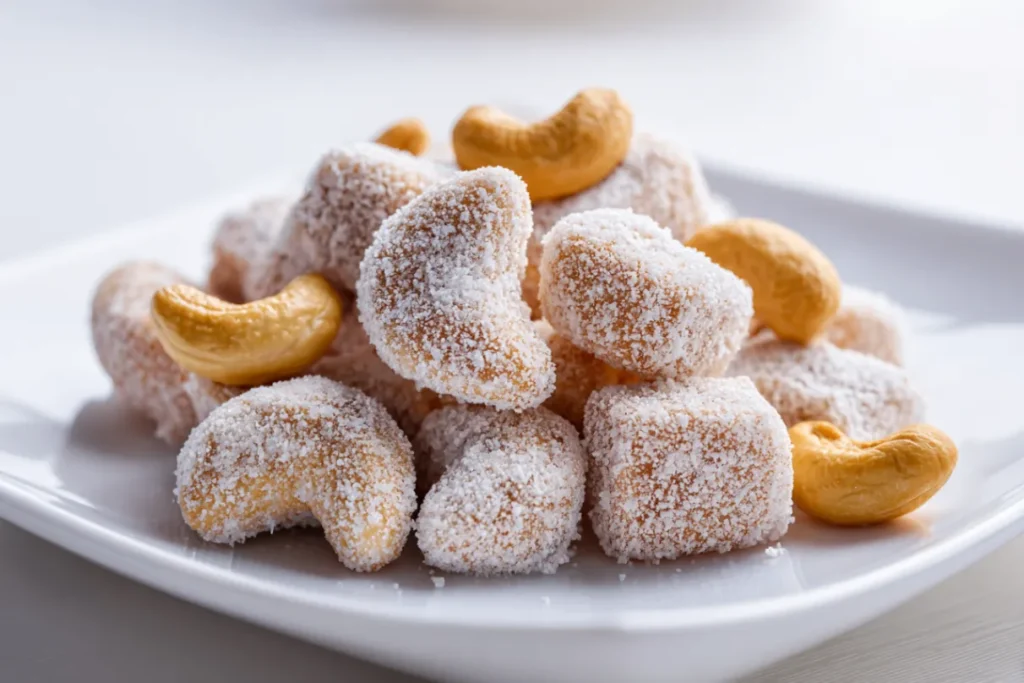
Cajuzinho’s charm lies not just in taste but in its adorable cashew-like appearance. After shaping your mixture into small, slightly flattened cone shapes (resembling cashews), roll them gently in refined sugar. The sugar coating adds textural contrast and authentic appearance.
For special occasions, I arrange cajuzinhos on decorative plates lined with colorful paper cups – just like you’d see in Brazilian confeitarias. A light dusting of cocoa powder around the plate adds elegant contrast.
Consider creating a Brazilian dessert table by pairing cajuzinho with brigadeiros and beijinhos for an authentic festa junina experience.
Best Sides and Pairings (Family-Tested Combinations)
Through years of serving cajuzinho at family gatherings, I’ve discovered perfect pairings:
Beverages: Strong Brazilian coffee creates the perfect balance to the sweet, rich fudge. Milk works wonderfully for children, while dessert wines complement adult gatherings.
Complementary Desserts: Serve alongside fresh fruit like sliced oranges or strawberries to cleanse the palate between these rich treats.
Special Occasions: Cajuzinho shines at birthday parties, holiday celebrations, and any time you want to share a taste of Brazil with loved ones.
Storing and Reheating Leftovers Safely
Proper storage ensures your Brazilian peanut fudge maintains its perfect texture and flavor:
Room Temperature: Store in airtight containers for up to 5 days. Place parchment paper between layers to prevent sticking.
Refrigeration: Extends life to 2 weeks, though the texture becomes firmer. Allow to come to room temperature before serving for best texture.
Freezing: Cajuzinho freezes beautifully for up to 3 months. Wrap individually in plastic wrap, then store in freezer bags. Thaw at room temperature for 30 minutes before serving.
Frequently Asked Questions About Cajuzinho
1. Can I prepare this Brazilian peanut fudge recipe in advance? Absolutely! I often make cajuzinho 2-3 days ahead for parties. The flavors actually develop and improve over time. Store in airtight containers at room temperature, and they’ll be perfect when you need them.
2. What’s the best way to store leftover cajuzinho? Keep them in airtight containers with parchment paper between layers. They maintain perfect texture for up to a week at room temperature. For longer storage, refrigerate for up to two weeks, but let them come to room temperature before serving.
3. How can I make this recipe healthier? I’ve experimented with using sugar-free condensed milk and adding extra nuts for protein. You can also reduce the white chocolate or substitute with dark chocolate for less sugar. The key is maintaining the cooking consistency.
4. Can I double the ingredients for a large party? Yes, but use a larger, heavy-bottomed pan and increase cooking time by 3-4 minutes. I’ve successfully made quadruple batches for community events. Just ensure constant stirring and don’t rush the process.
5. What’s the biggest mistake people make with cajuzinho? Rushing the cooking process! Many people use high heat trying to speed things up, which creates a grainy, unpleasant texture. Low, slow cooking creates that signature smooth consistency that makes cajuzinho so special.
 DINNER
 LUNCH
LUNCH CAKE
CAKE BREAKFAST
For more amazing recipes, be sure to check out our other sections to explore a variety of ideas that will enrich your cooking experience. Each section offers its own unique flavors to ensure a delightful culinary journey:
- Easy and Quick Recipes: A collection of dishes that guarantee delicious meals with minimal effort and time.
- Healthy Recipes: Discover healthy and delicious options that fit your lifestyle.
- Desserts: A diverse selection of sweets that will add a special touch of sweetness to your table.
- Lunch Recipes: Tasty lunch ideas that you can easily prepare to delight your family.
- Dinner Recipes: Delicious and easy-to-make recipes that will make your dinner a memorable occasion.
Conclusion: Your Journey to Brazilian Peanut Fudge Perfection
Making authentic cajuzinho has been one of my most rewarding culinary adventures. This Brazilian peanut fudge recipe connects you to generations of Brazilian home cooks who’ve perfected this beloved sweet treat. The combination of creamy peanut flavor, perfect texture, and charming presentation makes cajuzinho an unforgettable dessert experience.
I encourage you to try this recipe and make it your own. Every batch teaches you something new about achieving that perfect consistency and flavor balance. Don’t be discouraged if your first attempt isn’t perfect – even experienced cooks need practice to master the timing and texture.
Please share your cajuzinho adventures in the comments below! I love hearing about successful batches, creative variations, and even kitchen mishaps that lead to learning. Tag your photos with your homemade Brazilian peanut fudge – there’s nothing more satisfying than seeing this traditional recipe bring joy to kitchens around the world.
Remember, the best cajuzinho is made with love, patience, and quality ingredients. Once you master this recipe, you’ll have a special treat that brings people together and creates lasting memories around your table.