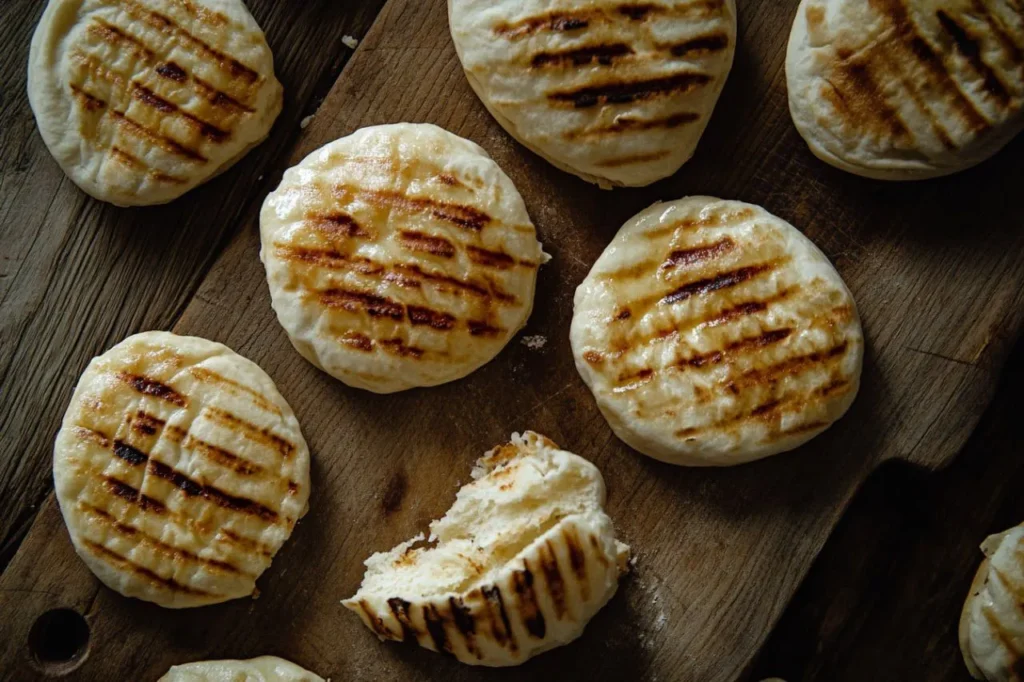
There’s something magical about the aroma of freshly grilled pita bread wafting through the kitchen. As someone who’s been perfecting grilled pita recipes for over a decade, I can honestly say that mastering this ancient bread has transformed my approach to Mediterranean cooking entirely. I still remember the first time I attempted grilled pita at home – it was a complete disaster! The pita turned out flat, chewy, and nothing like the fluffy, pocket-perfect bread I’d enjoyed at my favorite Greek restaurant.
That failure sparked a journey of discovery that led me to uncover the secrets behind perfect grilled pita recipes. Today, I’m thrilled to share everything I’ve learned about creating these delicious dishes that have become true family favorite recipes in my household. Whether you’re looking for easy homemade recipes to impress guests or simply want to elevate your weeknight dinners, grilled pita offers endless possibilities that will revolutionize your culinary repertoire.
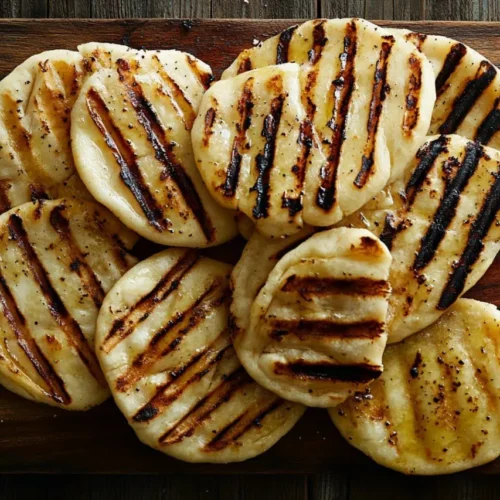
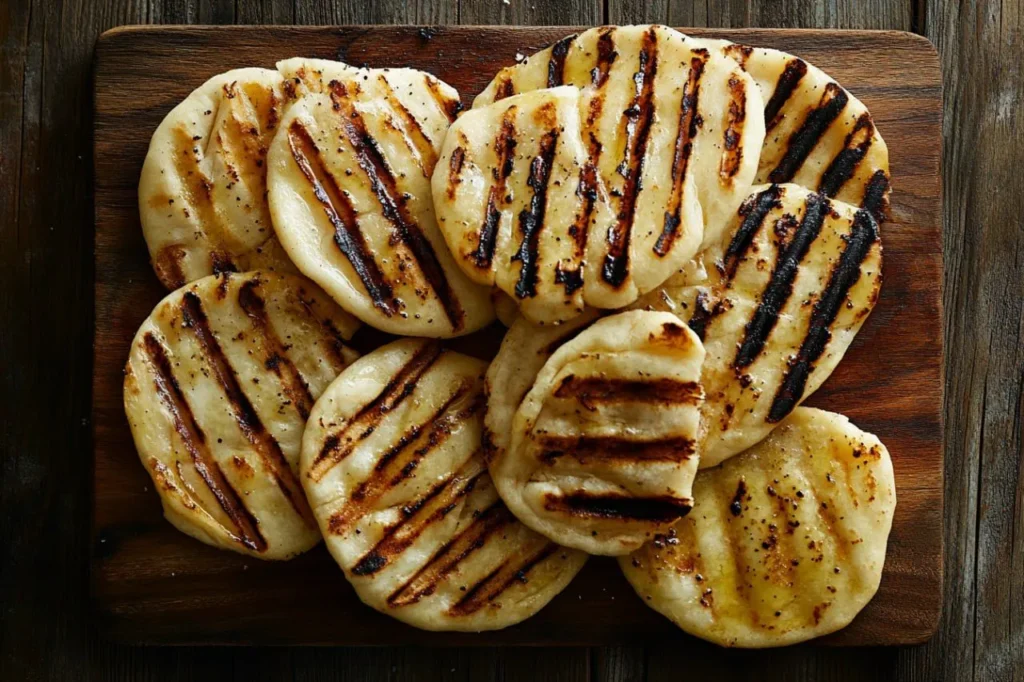
Perfect Grilled Pita Bread
Ingredients
- 3 cups all-purpose flour
- 1 packet active dry yeast
- 1 cup warm water 110°F
- 1 tablespoon olive oil
- 1 teaspoon salt
- 1 teaspoon sugar
Ingredients: Building the Foundation for Perfect Grilled Pita
Essential Ingredients and Their Crucial Roles
The beauty of grilled pita recipes lies in their simplicity, yet each ingredient plays a vital role in creating that perfect texture and flavor we all crave. The foundation starts with high-quality all-purpose flour, which provides the structure and chewiness that makes pita so satisfying. I’ve experimented with various flour types over the years, and while bread flour can work, all-purpose flour consistently delivers the best results for homemade grilled pita.
Active dry yeast serves as the magical catalyst that creates those coveted pockets in your pita bread. The fermentation process not only develops complex flavors but also contributes to the bread’s digestibility – one of the many health benefits of properly prepared grilled pita recipes. Warm water activates the yeast, and I’ve found that water heated to exactly 110°F (43°C) provides optimal conditions for yeast activation without killing these beneficial microorganisms.
Salt isn’t just a flavor enhancer in grilled pita recipes; it strengthens the gluten structure and controls fermentation speed. A touch of olive oil adds richness and helps create that tender crumb we associate with exceptional pita bread. Some recipes include a small amount of sugar to feed the yeast, though I’ve discovered that honey works beautifully as a natural alternative that adds subtle complexity to the final flavor profile.
Selecting Premium Quality Ingredients
When crafting delicious dishes like grilled pita, ingredient quality can make or break your results. For flour, I always recommend seeking out brands with consistent protein content between 10-12%. King Arthur and Bob’s Red Mill have never let me down, but local mill flours often provide superior flavor if you have access to them.
Fresh yeast makes an incredible difference in grilled pita recipes, though it can be challenging to find. If you’re using active dry yeast, check the expiration date religiously – expired yeast is the quickest way to ruin your homemade bread dreams. I store my yeast in the refrigerator and always proof it before using to ensure viability.
The olive oil you choose significantly impacts flavor, so invest in a good extra virgin variety for the best results. Greek or Italian oils work wonderfully in grilled pita recipes, adding authentic Mediterranean character. For salt, sea salt or kosher salt provides better flavor than standard table salt, and their larger crystals dissolve more evenly during mixing.
Smart Substitutions and Creative Alternatives
One of the joys of mastering grilled pita recipes is discovering how adaptable they are to different dietary needs and preferences. For those following gluten-free diets, a blend of rice flour, tapioca starch, and xanthan gum can create surprisingly good results, though the texture will differ from traditional wheat-based pita.
Whole wheat flour can replace up to half of the all-purpose flour in most grilled pita recipes, adding fiber and nutrients while maintaining good texture. This substitution aligns perfectly with the health benefits focus of modern cooking, providing additional B vitamins and minerals.
For dairy-free options, replace any milk in recipes with plant-based alternatives like oat or almond milk. Coconut oil can substitute for olive oil, though it will impart a subtle tropical flavor that works surprisingly well with Mediterranean seasonings. Yeast substitutions are trickier, but baking powder can work in a pinch for flatbread-style grilled pita, though you’ll miss out on the fermentation benefits and complex flavors that make traditional recipes so special.
Preparation Steps: Mastering the Art of Grilled Pita
Initial Preparation and Essential Cleaning Tips
Success with grilled pita recipes begins long before you touch the dough. I always start by organizing my workspace and ensuring all equipment is scrupulously clean. Yeast is sensitive to soap residue, so I rinse all bowls and utensils with very hot water after washing to remove any lingering detergent that might inhibit fermentation.
Temperature control is crucial for these delicious dishes, so I recommend using a kitchen thermometer to verify your water temperature when proofing yeast. Room temperature ingredients mix more easily and create better texture, so remove eggs and dairy from the refrigerator at least 30 minutes before beginning. This simple step dramatically improves the consistency of your grilled pita recipes.
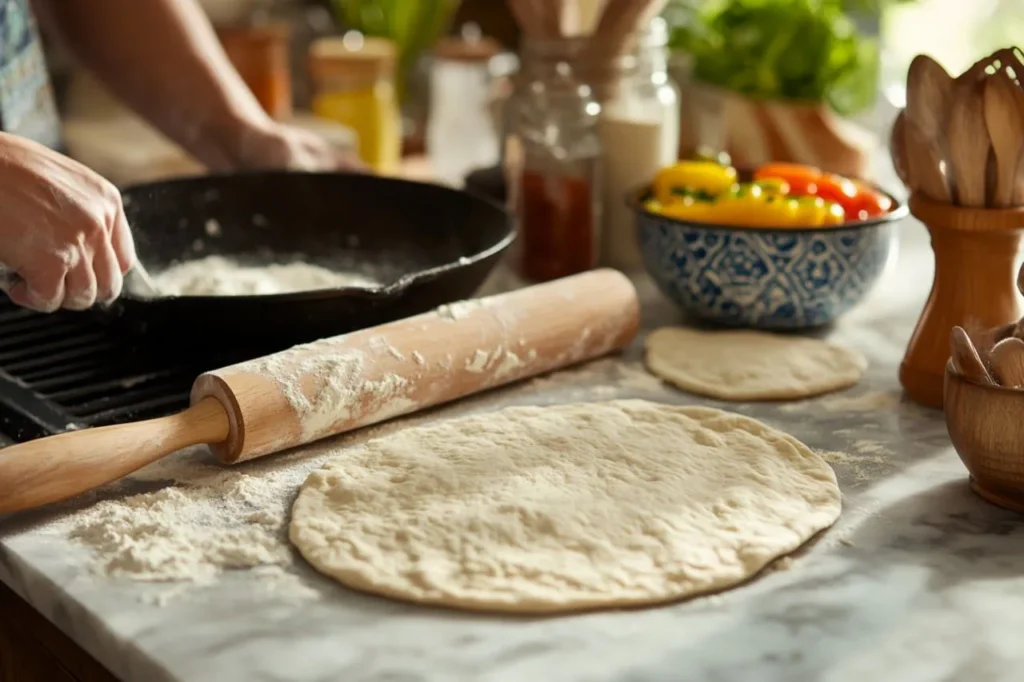
Prepare your work surface by lightly flouring it, but avoid over-flouring as this can make your dough tough. I keep a bench scraper handy for easy dough handling and cleanup. Having a clean, damp kitchen towel ready is essential for covering dough during rising periods – this prevents the surface from forming a skin that can interfere with proper rising.
Step-by-Step Cooking Instructions with Professional Secrets
The magic of exceptional grilled pita recipes lies in understanding the science behind each step. Begin by proofing your yeast in warm water with a pinch of sugar – this step should create a foamy mixture within 5-10 minutes. If it doesn’t foam, your yeast is dead, and you’ll need to start fresh.
When mixing your dough, resist the urge to add too much flour too quickly. The dough should be slightly sticky initially – this ensures proper hydration, which is crucial for steam creation during cooking. Knead for 8-10 minutes until the dough becomes smooth and elastic. A properly kneaded dough will pass the windowpane test: stretch a small piece thin enough to see light through without tearing.
The first rise is where patience pays off in grilled pita recipes. Place the dough in a lightly oiled bowl, cover with a damp towel, and let it rise in a warm, draft-free location for 1-2 hours until doubled. I create a proofing environment by turning my oven to its lowest setting for 2 minutes, then turning it off and placing the covered bowl inside.
After the first rise, gently punch down the dough and divide it into 8-10 equal portions. Roll each portion into a ball, then cover and let rest for 20 minutes. This rest period allows the gluten to relax, making rolling easier. Roll each ball into a 6-7 inch circle, approximately ¼ inch thick – too thin and they won’t puff, too thick and they won’t cook evenly.
Common Mistakes and Professional Solutions
Even experienced cooks can stumble with grilled pita recipes, so let me share the most common pitfalls I’ve encountered and how to avoid them. Over-flouring during rolling is perhaps the biggest mistake – it prevents proper puffing and creates tough, dense bread. Use just enough flour to prevent sticking, and dust off excess before cooking.
Temperature control while grilling is crucial for these easy homemade recipes. Too hot, and the outside burns before the inside cooks; too cool, and you won’t get proper puffing. I maintain medium-high heat and adjust as needed based on how the first few pita behave. A properly heated grill or pan should make the pita puff within 30-60 seconds.
Rolling thickness inconsistency ruins many grilled pita recipes. Use a ruler initially to train your eye for proper thickness – this attention to detail pays huge dividends in consistent results. Uneven rolling creates uneven cooking, with some areas burning while others remain doughy.
Don’t skip the resting periods! Rushing through rises and rest periods is a surefire way to produce tough, flat bread. The chemical processes that create flavor and texture need time to work their magic. I’ve learned that patience truly is a virtue when creating these delicious dishes.
Serving & Final Touches: Elevating Your Grilled Pita Experience
Creative Presentation Ideas That Wow
The presentation of grilled pita recipes can transform a simple meal into an impressive culinary experience. I love creating Mediterranean mezze boards with warm grilled pita as the centerpiece, surrounded by colorful dips like hummus, baba ganoush, and tzatziki. The contrast of warm, soft bread against cool, creamy dips creates both visual appeal and textural interest that guests absolutely love.
For family dinners, I often stuff grilled pita with various fillings to create handheld meals that even picky eaters enjoy. Try filling them with grilled vegetables, feta cheese, and fresh herbs for a vegetarian option, or with seasoned ground lamb and cucumber for a more traditional approach. The versatility of these family favorite recipes means you can adapt them to any dietary preference or flavor profile.
Consider serving grilled pita recipes as part of a build-your-own meal station. Set out various proteins, vegetables, sauces, and cheeses, allowing everyone to customize their perfect combination. This interactive approach works wonderfully for casual entertaining and ensures everyone finds something they love.
Perfect Pairings and Complementary Side Dishes
The beauty of grilled pita recipes lies in their ability to complement virtually any Mediterranean or Middle Eastern dish. Classic pairings include Greek salad, roasted vegetables, grilled meats, and various bean salads. The bread’s mild flavor and sturdy texture make it ideal for sopping up flavorful sauces and dressings.
For lighter meals, pair grilled pita with fresh fruit, cheese, and nuts for a sophisticated lunch or snack. The combination of warm bread with cool, fresh ingredients creates a satisfying meal that’s both nutritious and delicious. These easy homemade recipes shine when paired with seasonal produce – try them with summer tomatoes and basil or fall roasted squash and goat cheese.
Wine pairings work beautifully with grilled pita recipes. Light, crisp whites like Sauvignon Blanc or Pinot Grigio complement the bread’s subtle flavor without overwhelming it. For red wine lovers, light Pinot Noir or Chianti provide enough body to stand up to heartier fillings while maintaining balance.
Storage Solutions and Reheating Techniques
Proper storage ensures your grilled pita recipes maintain their quality for days after cooking. Cool completely before storing to prevent condensation that can make the bread soggy. I store cooled pita in airtight containers or sealed plastic bags at room temperature for up to three days, or freeze for up to three months.
For reheating, avoid the microwave if possible – it tends to make pita tough and chewy. Instead, wrap cooled pita in damp paper towels and warm in a 350°F oven for 5-7 minutes. This method revives the soft texture and makes the bread taste freshly made. For frozen pita, thaw completely before reheating using the same method.
A quick stovetop method works well for single servings: heat a dry skillet over medium heat and warm each pita for 30-60 seconds per side. This technique works particularly well when you want to crisp the exterior slightly while keeping the interior soft.
Health Benefits of Grilled Pita Recipes
Grilled pita recipes offer numerous health advantages that make them excellent choices for health-conscious families. The fermentation process involved in traditional pita preparation breaks down complex carbohydrates, making them easier to digest than many other bread types. This fermentation also creates beneficial compounds that support gut health.
When made with whole wheat flour, grilled pita provides significant fiber content, supporting digestive health and helping maintain stable blood sugar levels. The protein content in pita bread is higher than many other bread varieties, contributing to satiety and muscle maintenance.
The olive oil used in quality grilled pita recipes provides healthy monounsaturated fats that support heart health and help with nutrient absorption. When paired with fresh vegetables and lean proteins, these delicious dishes become part of a balanced, nutritious meal plan.
 DINNER
 LUNCH
LUNCH CAKE
CAKE BREAKFAST
For more amazing recipes, be sure to check out our other sections to explore a variety of ideas that will enrich your cooking experience. Each section offers its own unique flavors to ensure a delightful culinary journey:
- Easy and Quick Recipes: A collection of dishes that guarantee delicious meals with minimal effort and time.
- Healthy Recipes: Discover healthy and delicious options that fit your lifestyle.
- Desserts: A diverse selection of sweets that will add a special touch of sweetness to your table.
- Lunch Recipes: Tasty lunch ideas that you can easily prepare to delight your family.
- Dinner Recipes: Delicious and easy-to-make recipes that will make your dinner a memorable occasion.
Frequently Asked Questions
Q: Why doesn’t my pita puff up when grilling? A: Pita needs high heat and proper thickness to puff correctly. Ensure your grill or pan is hot enough (medium-high heat), roll the dough to an even ¼-inch thickness, and avoid over-flouring. The steam created inside the dough creates the pocket, so proper hydration and heat are essential.
Q: Can I make grilled pita dough ahead of time? A: Absolutely! Pita dough can be made up to 24 hours in advance and stored in the refrigerator. This slow fermentation actually improves flavor. Just bring it to room temperature before rolling and grilling. You can also freeze portioned dough balls for up to three months.
Q: What’s the best way to prevent pita from drying out while cooking multiple batches? A: Keep cooked pita wrapped in a clean, damp kitchen towel while cooking remaining batches. This maintains moisture and keeps them warm. Avoid stacking hot pita directly on top of each other, as this can create condensation that makes them soggy.
Q: Can I use a regular pan instead of a grill for these recipes? A: Yes! A heavy-bottomed skillet or cast-iron pan works excellently for grilled pita recipes. Heat the pan over medium-high heat and cook the pita for 1-2 minutes per side until puffed and lightly spotted. No oil is needed in the pan.
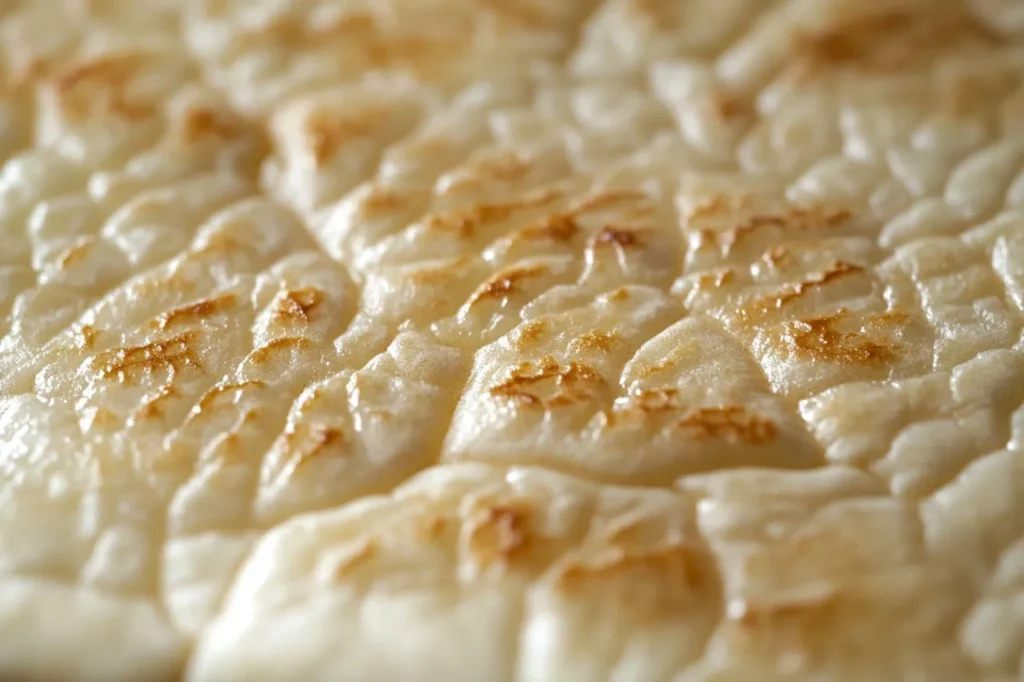
Q: How do I know when my pita is properly cooked? A: Properly cooked pita will puff up like a balloon and develop light golden-brown spots. The bread should sound hollow when tapped and feel soft but not doughy. If it’s browning too quickly before puffing, reduce the heat slightly.
Conclusion
Mastering grilled pita recipes has been one of the most rewarding culinary journeys I’ve undertaken. These versatile, delicious dishes have the power to transform ordinary meals into extraordinary experiences while providing significant health benefits for you and your family. The satisfaction of watching homemade pita puff up on the grill never gets old, and the smiles on my family’s faces when I serve these warm, fragrant breads make every minute of preparation worthwhile.
I encourage you to start your own grilled pita adventure today. Begin with the basic recipe, then experiment with different flours, seasonings, and fillings to create your own signature versions. Don’t be discouraged if your first attempts aren’t perfect – like any worthwhile skill, creating exceptional grilled pita takes practice, but the results are absolutely worth the effort.
Share your grilled pita creations with friends and family, and don’t forget to tell me about your experiences in the comments below. I love hearing how these family favorite recipes become part of your own culinary traditions. With patience, practice, and passion, you’ll soon be creating easy homemade recipes that rival any restaurant’s offerings.

Mary Berry’s Chicken Stroganoff Recipe | Creamy & Easy to Make
How to Make the Perfect Lemon Drizzle Cake at Home
Flounder And Zucchini Recipe: A Delicious And Healthy Combination
Pita Bread And Cheese Recipes: Tips, Pairings, and Family Favorites
Tunisian Couscous With Lamb: A Step By Step Guide To Flavor And Tradition
