Table of Contents
Introduction
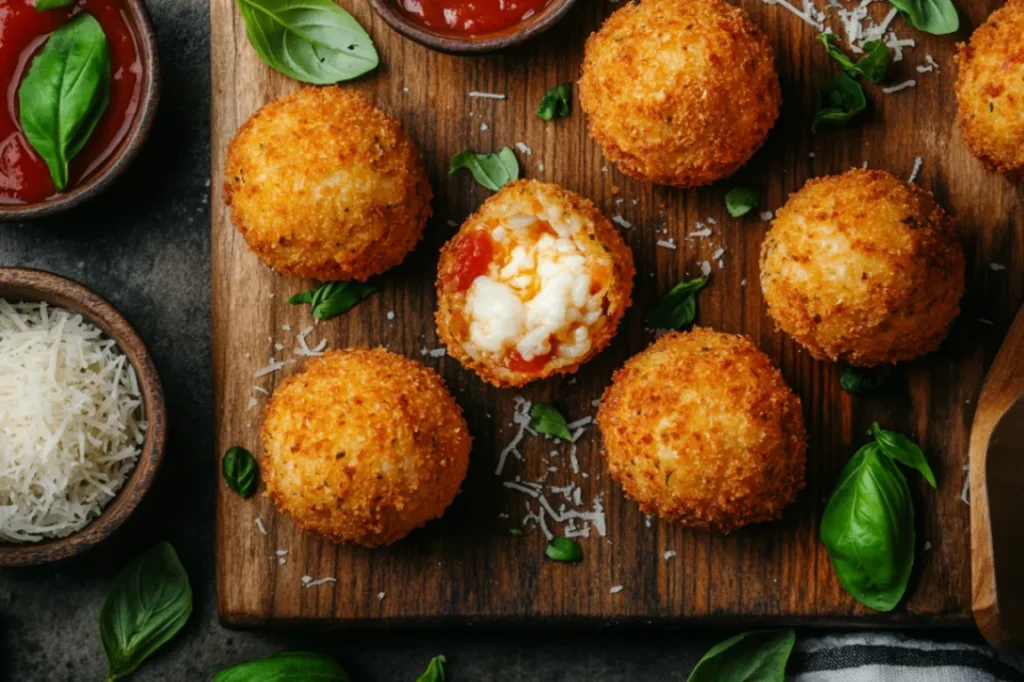
There’s something truly magical about arancini – those golden, crispy spheres of pure comfort that transport you straight to the heart of Sicily with every bite. I still remember my first encounter with these heavenly rice balls during a family trip to Palermo years ago. My grandmother, Nonna Rosa, watched with twinkling eyes as I bit into my first arancino, the molten mozzarella stretching like silken threads while the perfectly seasoned risotto melted on my tongue. That moment changed everything for me, and arancini became not just a dish, but a connection to my heritage and a symbol of love shared through food.
Today, I want to share with you everything I’ve learned about creating perfect arancini at home. These aren’t just any rice balls – they’re little parcels of joy that bring families together around the dinner table. Whether you’re hosting a dinner party, looking for the perfect appetizer, or simply craving some authentic Italian comfort food, mastering the art of arancini will elevate your culinary repertoire and create memories that last a lifetime.

Perfect Homemade Arancini
Learn to make perfect crispy arancini at home with this comprehensive guide featuring traditional Sicilian techniques and modern tips.
Ingredients
Instructions
- 1Prepare risotto by slowly adding warm stock to rice, stirring constantly until creamy and al dente. Cool completely.
- 2Shape cold risotto into balls, inserting mozzarella cube in center of each.
- 3Bread each ball by coating in flour, egg, then breadcrumbs. Refrigerate 30 minutes.
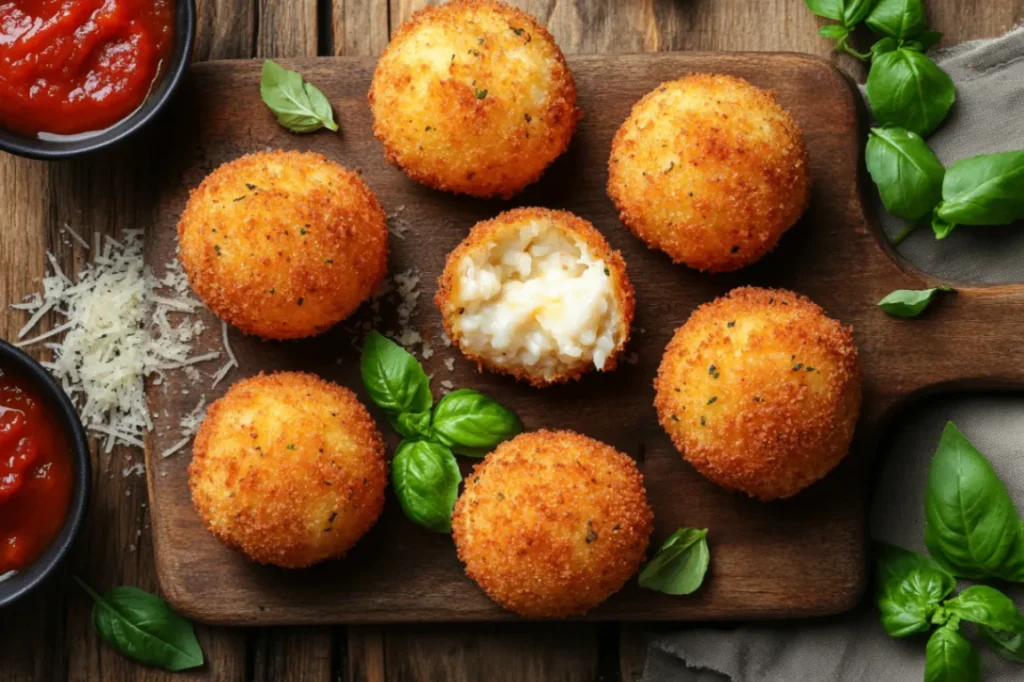
- 4Heat oil to 350°F. Fry arancini in batches until golden brown, 3-4 minutes.
- 5Drain on paper towels and serve immediately with marinara sauce.
Essential Ingredients for Perfect Arancini
Understanding the Heart of Arancini: Key Ingredients and Their Roles
The beauty of authentic arancini lies in the harmony of simple, high-quality ingredients working together to create something extraordinary. At the foundation of every great arancino is Arborio rice – this short-grain Italian rice variety is absolutely non-negotiable. Its high starch content creates that creamy, almost custard-like texture that defines proper risotto, which then transforms into the perfect base for your rice balls.
The cheese component is equally crucial to achieving restaurant-quality arancini. Fresh mozzarella provides that signature molten center that makes each bite a delightful surprise, while Parmigiano-Reggiano adds depth and umami richness to the rice mixture. I always tell my friends that the quality of your cheese will make or break your arancini – invest in the good stuff, and your taste buds will thank you.
Don’t overlook the importance of a well-seasoned stock. Whether you choose chicken, vegetable, or beef stock, it should be warm, flavorful, and preferably homemade. The stock infuses every grain of rice with flavor, creating a foundation that’s anything but bland. A splash of white wine adds acidity and complexity, while saffron (if you’re making the traditional Sicilian version) imparts that gorgeous golden color and subtle floral notes that make arancini truly special.
Selecting the Best Quality Ingredients for Authentic Arancini
When shopping for arancini ingredients, quality should always trump quantity. For the rice, seek out authentic Italian Arborio rice from reputable brands – the texture difference between genuine Arborio and generic short-grain rice is remarkable. I’ve found that imported Italian varieties maintain their structure better during cooking and provide that essential creamy texture we’re after.
For mozzarella, fresh is always best, but it needs to be well-drained to prevent soggy arancini. I recommend buying whole milk mozzarella and cubing it yourself rather than purchasing pre-shredded cheese, which often contains anti-caking agents that affect melting. Store your mozzarella cubes on paper towels in the refrigerator to remove excess moisture before using.
The breadcrumbs deserve special attention too. While store-bought panko works in a pinch, nothing beats homemade breadcrumbs from day-old Italian bread. The texture and flavor are incomparably better, and they create that perfect golden crust that makes arancini so visually appealing. If you must use store-bought, choose panko over regular breadcrumbs for superior crunch and texture.
Smart Substitutions and Creative Alternatives
While traditional arancini recipes are sacred, there’s room for creativity and dietary accommodations without sacrificing flavor. For those avoiding gluten, substitute regular breadcrumbs with gluten-free panko or even finely crushed gluten-free crackers. The key is maintaining that crucial crispy exterior that contrasts beautifully with the creamy interior.
Vegetarians can easily adapt arancini by using high-quality vegetable stock instead of chicken or beef stock. Mushroom stock adds incredible depth and umami that rivals any meat-based version. For vegan arancini, replace traditional cheeses with cashew-based alternatives or nutritional yeast, though the texture will be different from the classic version.
Don’t be afraid to experiment with different rice varieties if Arborio isn’t available. Carnaroli rice, another Italian short-grain variety, actually works even better than Arborio for risotto and, consequently, for arancini. Bomba rice from Spain or even sushi rice can work in a pinch, though you’ll need to adjust cooking times and liquid ratios accordingly.

Mastering the Preparation Process
Initial Preparation and Essential Setup Tips
Success with arancini begins long before you start cooking the rice. Proper preparation and organization – what the French call mise en place – will make the difference between stress-free cooking and kitchen chaos. Start by preparing your workspace with three separate stations: one for the cooled risotto, one for your assembly line (flour, beaten eggs, breadcrumbs), and one near your stovetop for frying.
The risotto base should ideally be made a day ahead and thoroughly chilled. Cold risotto is much easier to handle and shape, and the flavors have time to meld and develop. When preparing the risotto specifically for arancini, make it slightly firmer than you would for serving as a standalone dish – it should hold together well when cooled but not be dry or stiff.
Temperature control is crucial throughout the entire arancini-making process. Your oil should be maintained at exactly 350°F (175°C) for optimal results. Too hot, and the exterior burns before the interior warms through; too cool, and you’ll end up with greasy, soggy rice balls. Invest in a good thermometer and test the oil temperature with a small piece of bread – it should sizzle immediately and turn golden brown in about 30 seconds.
Step-by-Step Cooking Instructions with Professional Secrets
Creating perfect arancini is an art form that requires patience and attention to detail. Begin by scooping portions of your chilled risotto – each portion should be about the size of a tennis ball. Using slightly damp hands (this prevents sticking), gently flatten each portion in your palm and place a cube of mozzarella in the center. The secret here is not to overfill – too much cheese will cause the arancini to burst during frying.
Carefully wrap the risotto around the cheese, ensuring there are no air pockets or thin spots in the rice coating. Roll each ball between your palms until perfectly smooth and round. This step requires a gentle touch – overworking the mixture will make the rice gummy and unpleasant.
The breading process follows the classic three-step method, but with a crucial modification that most home cooks overlook. After coating each arancino in flour, egg, and breadcrumbs, let them rest in the refrigerator for at least 30 minutes. This resting period allows the coating to set properly and prevents the breading from falling off during frying. For even better results, bread them twice – a double coating creates an incredibly crispy exterior that rivals the best Italian restaurants.
Common Pitfalls and How to Avoid Them
Even experienced cooks can stumble when making arancini, but knowing these common mistakes will help you avoid disappointment. The most frequent error is using risotto that’s too warm or not thick enough. Warm risotto won’t hold its shape, and thin risotto will leak during cooking, creating a mess in your oil and ruining the final product.
Another critical mistake is overcrowding the frying pan. Arancini need space to cook evenly, and adding too many at once will dramatically lower the oil temperature. Fry them in small batches, allowing the oil to return to proper temperature between batches. This patience pays off with consistently golden, perfectly cooked results.
Water is the enemy of good frying, so ensure your arancini are completely dry before they hit the oil. Pat them gently with paper towels if needed, and never fry them straight from the refrigerator – let them come to room temperature for about 15 minutes first. This prevents the extreme temperature shock that can cause them to crack or cook unevenly.
Serving Excellence and Final Touches
Creative Presentation Ideas That Wow Your Guests
Presentation transforms simple arancini into an elegant dining experience worthy of the finest Italian restaurants. Traditional serving involves placing them on a warm platter lined with clean kitchen towels to absorb any excess oil, but you can elevate this with modern plating techniques. Consider serving individual arancini on small appetizer plates with a dollop of warm marinara sauce and a sprinkle of fresh herbs.
For dinner parties, create height and visual interest by stacking arancini on tiered serving stands, garnished with microgreens and a light dusting of freshly grated Parmigiano-Reggiano. The golden color of properly fried arancini is naturally beautiful, so complement it with colorful accompaniments like bright red marinara, vibrant green basil leaves, or even edible flowers for special occasions.
Family-style serving works wonderfully too – arrange the arancini on a rustic wooden board alongside small bowls of different dipping sauces. This creates an interactive dining experience that encourages sharing and conversation, staying true to the communal spirit of Italian dining.
Perfect Pairings and Complementary Side Dishes
While arancini are delicious on their own, thoughtful pairings can transform them into a complete meal or sophisticated appetizer course. The classic accompaniment is a simple marinara sauce, but don’t stop there. Consider offering a variety of dipping options: spicy arrabiata for heat lovers, creamy alfredo for richness, or even a tangy pesto for herbaceous freshness.
For a complete Italian meal, serve arancini alongside a fresh caprese salad – the cool, creamy mozzarella and bright tomatoes provide a perfect contrast to the warm, crispy rice balls. A simple arugula salad dressed with lemon vinaigrette also works beautifully, adding peppery notes that cut through the richness of the fried rice.
Wine pairing deserves consideration too. A crisp Pinot Grigio or Soave complements the fried elements without overwhelming the delicate flavors, while a light Chianti Classico pairs beautifully if you’re serving arancini as part of a heartier meal. For non-alcoholic options, sparkling water with lemon or a traditional Italian soda creates the perfect palate cleanser.
Storage Solutions and Reheating for Best Results
Proper storage ensures you can enjoy leftover arancini without compromising quality. Completely cooled arancini can be stored in the refrigerator for up to three days, placed in a single layer in an airtight container with paper towels to absorb moisture. For longer storage, freeze them for up to three months – freeze them individually on a baking sheet first, then transfer to freezer bags to prevent sticking.
Reheating requires care to maintain that crucial contrast between crispy exterior and creamy interior. The oven method works best: preheat to 350°F (175°C) and bake for 10-15 minutes, turning once halfway through. This gentle reheating warms them thoroughly while re-crisping the coating. Avoid the microwave, which will make them soggy and unevenly heated.
For frozen arancini, there’s no need to thaw first – simply add an extra 5-10 minutes to the reheating time. You can also refresh day-old arancini by brushing them lightly with olive oil before reheating, which helps restore some of that initial crispiness that makes them so irresistible.
Frequently Asked Questions
Q: Can I make arancini ahead of time for a party? A: Absolutely! This is actually one of the best party foods because most of the work can be done in advance. Prepare and bread your arancini up to a day ahead, then store them covered in the refrigerator. Fry them just before serving for the best texture and temperature. You can even fry them completely and reheat in the oven, though fresh-fried is always superior.
Q: Why do my arancini fall apart when frying? A: This usually happens when the risotto is too warm, too thin, or hasn’t been properly chilled. Make sure your risotto base is completely cold and thick enough to hold its shape. Also, don’t skip the resting period after breading – this crucial step helps the coating adhere properly and prevents breakage during frying.
Q: What’s the best oil for frying arancini? A: Use a neutral oil with a high smoke point like vegetable oil, canola oil, or peanut oil. Avoid olive oil for deep frying as it has a lower smoke point and can impart a bitter flavor at high temperatures. You’ll need enough oil to completely submerge the arancini – usually about 3-4 inches deep in your pot.
Q: How do I know when the arancini are perfectly cooked? A: Properly cooked arancini will be deep golden brown all over and register an internal temperature of 165°F (74°C). They should sound hollow when tapped gently and feel firm but not hard. The cooking process typically takes 3-4 minutes per batch, but use visual and temperature cues rather than relying solely on timing.
Q: Can I bake arancini instead of frying them? A: While baking is healthier, it won’t give you the same crispy texture that makes arancini special. If you must bake, brush them generously with olive oil, bake at 425°F (220°C) for about 20-25 minutes, turning once. The results will be different but still delicious – think of them as Italian-style stuffed rice cakes rather than traditional arancini.
 DINNER
 LUNCH
LUNCH CAKE
CAKE BREAKFAST
For more amazing recipes, be sure to check out our other sections to explore a variety of ideas that will enrich your cooking experience. Each section offers its own unique flavors to ensure a delightful culinary journey:
- Easy and Quick Recipes: A collection of dishes that guarantee delicious meals with minimal effort and time.
- Healthy Recipes: Discover healthy and delicious options that fit your lifestyle.
- Desserts: A diverse selection of sweets that will add a special touch of sweetness to your table.
- Lunch Recipes: Tasty lunch ideas that you can easily prepare to delight your family.
- Dinner Recipes: Delicious and easy-to-make recipes that will make your dinner a memorable occasion.
Conclusion
Making perfect arancini at home is more than just following a recipe – it’s about connecting with centuries of Italian culinary tradition and creating moments of joy around your dinner table. These golden spheres of comfort food represent the best of Italian cooking: simple ingredients transformed through technique and love into something truly extraordinary.
Don’t be intimidated by the process. Like all great dishes, arancini improve with practice, and even your first attempts will likely be delicious. The key is to approach each step with patience and respect for the ingredients. Remember, you’re not just making food; you’re creating edible memories that will bring smiles to faces and warmth to hearts.
I encourage you to make this recipe your own. Try different cheese combinations, experiment with fillings like ragu or peas, or add your favorite herbs to the risotto base. Share your creations with family and friends, and don’t forget to tell them the story behind these magical rice balls. Food is always better when it comes with a story.
Most importantly, enjoy the process. There’s something meditative about shaping each arancino by hand, something satisfying about watching them turn golden in the oil, and something purely joyful about sharing them with people you love. That’s the true magic of arancini – they’re not just food, they’re love made edible.
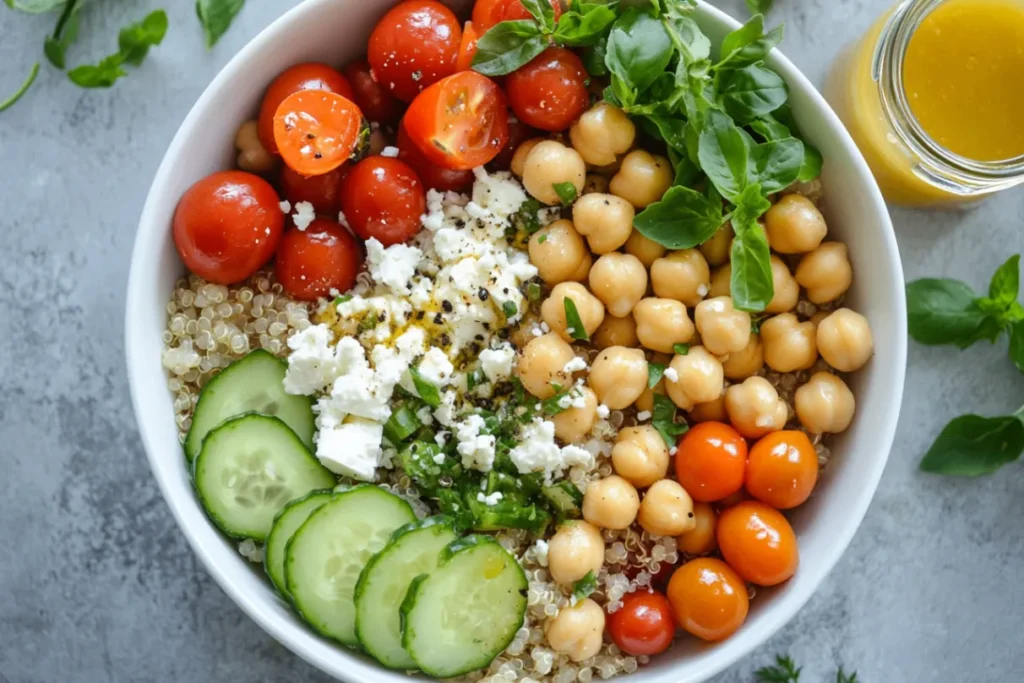
Healthy Summer Recipe for a Fresh and Nutritious Meal: Quinoa Power Bowl

Classic Vanilla Cheesecake – My Homemade Twist Inspired by Anna Olson
The Ultimate Coronation Chicken Recipe: A Royal Dish Made Simple
Creamy Mushroom and Chicken Risotto: A Family Favorite That Never Fails

Health Benefits Greek Yogurt: Your Complete Guide to Nature’s Protein Powerhouse