Table of Contents
Published: January 2025 | Prep Time: 15 minutes | Cook Time: 0 minutes | Serves: 8
I’ll never forget the first time I tasted my neighbor Um Hassan’s hummus. I was eight years old, and she had invited our whole Lebanese-American community for Eid celebrations. As soon as I dipped that first piece of warm pita into her silky, cloud-like hummus, I knew I had been living in the dark ages of store-bought containers.
Years later, when I started making my own hummus, I went through countless failed attempts – grainy textures, bland flavors, and dips that looked more like chunky peanut butter than the smooth, luxurious hummus I remembered. It wasn’t until Um Hassan finally shared her secrets with me (after much persistent asking!) that I learned the techniques that would change my hummus game forever.
This recipe for Homemade Hummus Better Than Store-Bought isn’t just another chickpea dip – it’s a master class in creating restaurant-quality hummus using ingredients you can find at any American grocery store. The secret isn’t just in what you add, but in how you treat each ingredient with the respect it deserves.
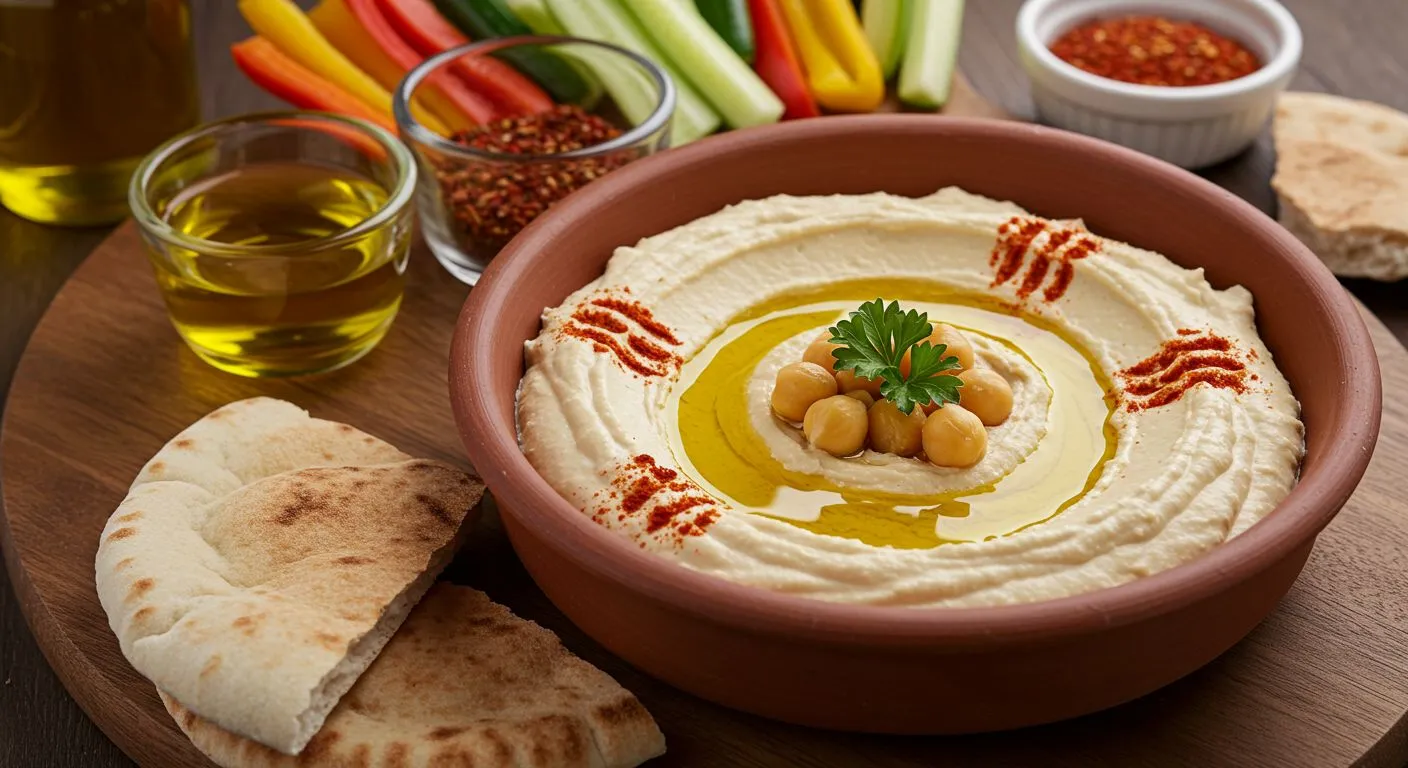
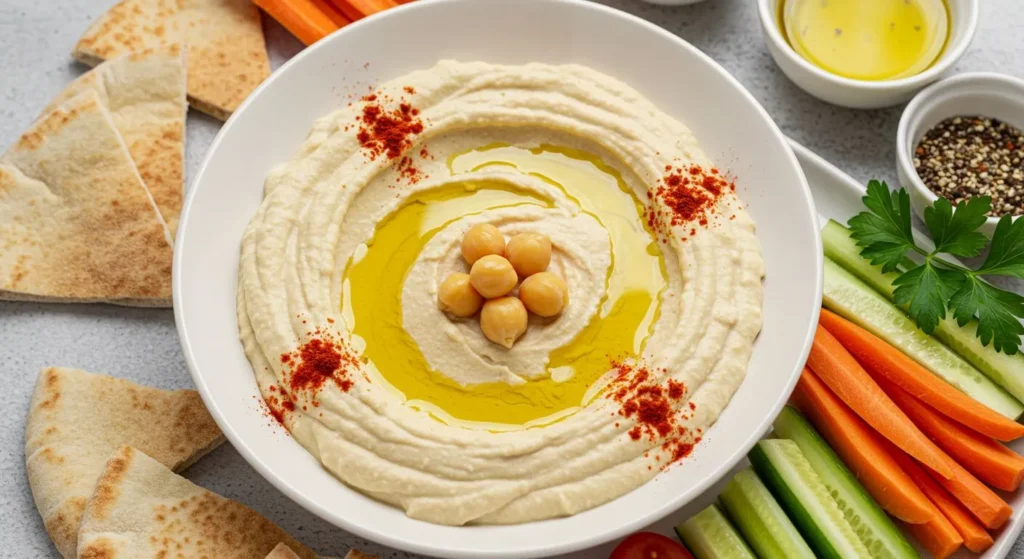
Homemade Hummus Better Than Store-Bought
This smooth, restaurant-quality homemade hummus recipe uses secret Middle Eastern techniques to create the silkiest dip, better than any store-bought version. Includes step-by-step instructions, professional tips, and creative flavor variations.
Ingredients
Instructions
- 1Drain, rinse, and peel chickpeas. Boil with baking soda for 10 minutes, then rinse with cold water.
- 2Blend tahini and lemon juice in a food processor until light and creamy.
- 3Add garlic, cumin, and salt. Process until fully combined.
- 4Add half the chickpeas and blend, then add the rest and blend again. Slowly add ice water until smooth.
- 5Transfer to a bowl, drizzle with olive oil, sprinkle with paprika, and add garnishes. Let rest 30 minutes before serving.
Why This Hummus Recipe Will Revolutionize Your Kitchen
After perfecting this recipe over the past fifteen years, I can confidently say it will transform how you think about hummus:
- Silky smooth texture: Rivals the best Middle Eastern restaurants
- Complex, balanced flavor: Layers of taste that develop with each bite
- Incredibly economical: Makes double the amount for half the cost of store-bought
- No weird preservatives: Just pure, wholesome ingredients
- Customizable: Perfect base for countless flavor variations
- Keeps beautifully: Actually improves in flavor over 2-3 days
- Impressive to guests: Restaurant-quality results that wow everyone
The Secret Ingredients for Superior Hummus
Essential Base Ingredients:
- 2 cans (15 oz each) high-quality chickpeas (or 1 1/2 cups dried, cooked)
- 1/4 cup fresh lemon juice (about 1 large lemon)
- 1/4 cup tahini (stir well before measuring)
- 1 small garlic clove, minced (start with less, add more to taste)
- 2 tablespoons extra-virgin olive oil, plus more for serving
- 1/2 teaspoon ground cumin
- Salt to taste
- 2-3 tablespoons water
- Dash of paprika for serving
Um Hassan’s Secret Additions:
- 1/2 teaspoon baking soda (the game-changer for silkiness!)
- Ice water (for temperature control during blending)
- 1 tablespoon tahini paste mixed with lemon juice (creates the perfect emulsion)
Optional Flavor Enhancers:
- 1/4 teaspoon ground white pepper (milder than black pepper)
- 1/2 teaspoon sumac (tangy Middle Eastern spice, available online)
- 1 tablespoon pine nuts (traditional Lebanese garnish)
Step-by-Step Instructions for Perfect Hummus
Step 1: Prepare the Chickpeas Like a Pro (10 minutes)
This step is absolutely crucial and what separates restaurant-quality hummus from mediocre homemade versions. Drain and rinse your canned chickpeas thoroughly. Now here’s the secret: remove the skins!
I know it sounds tedious, but trust me on this. Rub the chickpeas between your hands or with a kitchen towel. The skins will loosen and float away when you rinse them in a bowl of water. You don’t need to get every single skin, but removing most of them creates that incredibly smooth texture we’re after.
For an even silkier result, place the skinned chickpeas in a pot with the 1/2 teaspoon of baking soda and cover with water. Bring to a boil and cook for 10 minutes. This breaks down the chickpea proteins even further. Drain and rinse with cold water.
Step 2: Create the Tahini-Lemon Emulsion (3 minutes)
In your food processor, combine the tahini and lemon juice first. This is critical – the acid in the lemon juice helps create a stable emulsion with the tahini, preventing that grainy texture that plagues many homemade hummus attempts.
Process for 1-2 minutes until the mixture becomes whipped and creamy. It should lighten in color and increase in volume. This base will make your final hummus incredibly smooth.
Step 3: Add Aromatics and Build Flavor (2 minutes)
Add the minced garlic, cumin, and 1/2 teaspoon of salt to the tahini-lemon mixture. Process for another 30 seconds. The garlic should be completely minced and evenly distributed.

Step 4: Add Chickpeas and Process to Perfection (5 minutes)
Add half of your prepared chickpeas to the food processor and process for 1 minute. Scrape down the sides, then add the remaining chickpeas and process for another 1-2 minutes.
Now here’s where patience pays off: continue processing while slowly drizzling in ice water, one tablespoon at a time, until you reach your desired consistency. The hummus should be smooth and creamy but still hold its shape. This can take 3-5 minutes total – don’t rush it!
Taste and adjust: add more lemon juice for tang, salt for flavor balance, or garlic for intensity. Remember, flavors will develop even more as it sits.
Step 5: The Final Touch and Presentation
Transfer your hummus to a serving bowl and use the back of a spoon to create a shallow well in the center. Drizzle with good quality extra-virgin olive oil, sprinkle with paprika, and add any garnishes you love.
Let it rest for at least 30 minutes before serving – this allows the flavors to meld and develop. Serve at room temperature with warm pita bread, fresh vegetables, or use as a spread in sandwiches.

Professional Tips for Hummus Mastery
Ingredient Quality Secrets:
- Tahini quality matters: Look for brands that are smooth and well-stirred (Soom, Joyva, or Whole Foods brand)
- Fresh lemon juice only: Bottled juice lacks the bright acidity needed for proper emulsion
- Extra-virgin olive oil: Use your best oil for drizzling – it makes a noticeable difference
- Garlic balance: Start with less; you can always add more but can’t take it away
Texture Perfection Techniques:
- Temperature control: Ice water keeps the motor from overheating the mixture
- Processing time: Don’t shortcut the processing time – smooth hummus takes patience
- Chickpea preparation: Removing skins and the baking soda treatment are game-changers
- Emulsion first: Always blend tahini and lemon juice before adding other ingredients
Flavor Development Tips:
- Rest period: Hummus tastes better after sitting for at least 30 minutes
- Room temperature serving: Cold hummus lacks flavor impact
- Salt gradually: Easy to over-salt; taste and adjust incrementally
- Acid balance: The tangy-rich balance should make your mouth water
Nutritional Benefits (Per 2-tablespoon serving)
- Calories: 70
- Protein: 3g
- Carbohydrates: 6g
- Fat: 4.5g
- Fiber: 2g
- Sodium: 115mg
Hummus is a nutritional powerhouse, providing plant-based protein, healthy fats, fiber, and essential minerals like folate and iron.
Storage and Freshness Tips
Proper Storage Methods:
- Refrigeration: Store covered for up to 1 week
- Freezing: Freezes well for up to 3 months (may need re-blending after thawing)
- Oil layer: A thin layer of olive oil on top prevents drying
- Airtight containers: Prevents absorption of refrigerator odors
Serving and Freshness:
- Bring to room temperature: Remove from fridge 30 minutes before serving
- Refresh if needed: Blend in a tablespoon of warm water if it thickens too much
- Surface oil: Stir in any separated oil before serving
- Fresh garnish: Add fresh herbs and oil drizzle just before serving
Creative Variations and Flavor Twists
Traditional Middle Eastern Variations:
- Beiruti Style: Add extra garlic and top with whole chickpeas and pine nuts
- Damascus Special: Include a touch of pomegranate molasses
- Palestinian Classic: Garnish with hard-boiled egg slices and sumac
- Turkish Style: Add roasted red pepper and a pinch of Aleppo pepper
Modern American Fusion:
- Roasted Red Pepper: Blend in 1/2 cup roasted red peppers
- Herb Garden: Add fresh cilantro, parsley, and mint
- Spicy Jalapeño: Include seeded jalapeño and chipotle powder
- Avocado: Blend in 1/2 avocado for ultra-creaminess
Seasonal Specialties:
- Fall Harvest: Roasted butternut squash and sage
- Spring Fresh: Peas, mint, and lemon zest
- Summer Garden: Sun-dried tomatoes and basil
- Winter Comfort: Roasted garlic and rosemary
Dietary Modifications:
- Oil-free: Increase water and add vegetable broth for richness
- Lower sodium: Use no-salt chickpeas and control salt additions
- Nut-free: Substitute sunflower seed butter for tahini (different flavor profile)
- Protein boost: Add a scoop of plain Greek yogurt
 DINNER
  LUNCH
LUNCH  CAKE
CAKE  BREAKFAST
 For more amazing recipes, be sure to check out our other sections to explore a variety of ideas that will enrich your cooking experience. Each section offers its own unique flavors to ensure a delightful culinary journey:
- Easy and Quick Recipes: A collection of dishes that guarantee delicious meals with minimal effort and time.
- Healthy Recipes: Discover healthy and delicious options that fit your lifestyle.
- Desserts: A diverse selection of sweets that will add a special touch of sweetness to your table.
- Lunch Recipes: Tasty lunch ideas that you can easily prepare to delight your family.
- Dinner Recipes: Delicious and easy-to-make recipes that will make your dinner a memorable occasion.
Frequently Asked Questions
Q: Why is my hummus grainy instead of smooth?
A: The most common causes are: not removing chickpea skins, not processing long enough, or tahini that wasn’t properly emulsified with lemon juice first. Try the baking soda treatment and longer processing time.
Q: Can I use dried chickpeas instead of canned?
A: Absolutely! Soak 3/4 cup dried chickpeas overnight, then cook until very soft (1-2 hours). Dried chickpeas often produce smoother hummus and you can control the sodium content.
Q: How can I make my hummus less bitter?
A: Bitterness usually comes from too much tahini or lemon juice. Balance it with a pinch of sugar or add more chickpeas. Some tahini brands are naturally more bitter than others.
Q: What’s the best way to thin out thick hummus?
A: Add warm water or the cooking liquid from chickpeas, one tablespoon at a time, while processing. Ice water works too but warm liquid incorporates more easily.
Q: Can I make hummus without tahini?
A: While tahini is traditional and provides crucial creaminess, you can substitute with well-mixed peanut butter, sunflower seed butter, or even Greek yogurt for a different but still delicious result.
Q: How do I fix over-garlicked hummus?
A: Unfortunately, you can’t remove garlic flavor. Your best bet is to make another batch without garlic and mix them together, or add more chickpeas and tahini to dilute the garlic intensity.
Q: Why does restaurant hummus taste better than mine?
A: Restaurants often use dried chickpeas, remove all skins, process for much longer, and use high-quality tahini. They also serve at the perfect temperature and use excellent olive oil for finishing.
Q: Can I make hummus ahead for parties?
A: Yes! Hummus actually improves in flavor after a day or two. Make it 2-3 days ahead, but add fresh garnishes and olive oil just before serving.
The Cultural Heart of Hummus
Hummus isn’t just food in Middle Eastern culture – it’s a symbol of hospitality, community, and love. In Lebanon, making hummus is often a communal activity, with family members gathering to help remove chickpea skins and debate the perfect ratio of tahini to lemon juice.
The word “hummus” comes from the Arabic word for chickpea, and every family has their own closely guarded secrets passed down through generations. Some swear by a particular brand of tahini, others insist on a specific technique for achieving the perfect smoothness.
When Lebanese families immigrated to America, hummus became one of the bridges between their heritage and their new home. It was familiar enough to American palates to be accepted, yet distinct enough to maintain cultural identity. Today, hummus is one of the fastest-growing categories in American grocery stores, a testament to how wonderful foods transcend cultural boundaries.
Serving Suggestions and Pairings
Traditional Middle Eastern Style:
- Warm pita bread, torn by hand
- Fresh vegetables: cucumber, radish, tomato
- Pickled turnips and olives
- Arak or strong mint tea
American Casual:
- Toasted pita chips or crackers
- Raw vegetables: carrots, bell peppers, celery
- Pretzels or bagel chips
- Cold beer or lemonade
Elevated Entertaining:
- Homemade herb flatbread
- Grilled vegetables
- Artisanal cheeses and olives
- Wine pairing: Sauvignon Blanc or Rosé
Creative Applications:
- Sandwich spread instead of mayo
- Base for Buddha bowls
- Dollop on soups
- Sauce for grilled meats
Why This Recipe Works in American Kitchens
After teaching this recipe to hundreds of American home cooks, I’ve learned what makes it successful:
- Accessible ingredients: Everything available in standard grocery stores
- Clear techniques: Step-by-step instructions that guarantee success
- Flexible timing: Can be made ahead and improves with time
- Nutritious and filling: Satisfies American health consciousness
- Impressive but approachable: Looks restaurant-quality but doable at home
- Cost-effective: Much cheaper than buying premium store brands
Related Middle Eastern Recipes
If you love this homemade hummus, you’ll also enjoy:
- Lebanese Chicken Shawarma Bowls – Perfect protein pairing
- Arabic Rice Pilaf – Classic accompaniment
- Za’atar Roasted Vegetables – Great for dipping
- Middle Eastern Stuffed Bell Peppers – Complete meal ideas
Final Thoughts
This Homemade Hummus Better Than Store-Bought recipe represents more than just a dip – it’s a gateway to understanding Middle Eastern flavors and techniques. The patience required to remove chickpea skins, the precision needed for proper emulsion, and the balance required for perfect seasoning all teach us about the care that goes into traditional cooking.
When you make this hummus, you’re not just preparing food – you’re participating in a culinary tradition that spans thousands of years and countless generations. Every smooth, creamy spoonful carries the wisdom of grandmothers who perfected these techniques through decades of practice.
The beauty of this recipe is that it honors tradition while working perfectly in modern American kitchens. It uses accessible ingredients, clear techniques, and produces results that will make you never want to buy store-bought hummus again.
Take your time, trust the process, and remember that the best hummus is made with love and shared with joy. Whether you’re serving it at a casual family dinner or an elegant dinner party, this hummus will bring people together around the table – which is, after all, the true purpose of all great food.
Sahtenee! (To your health!)
Share your homemade hummus creations with us – we love seeing how our recipes bring authentic Middle Eastern flavors to your American kitchen!