Table of Contents
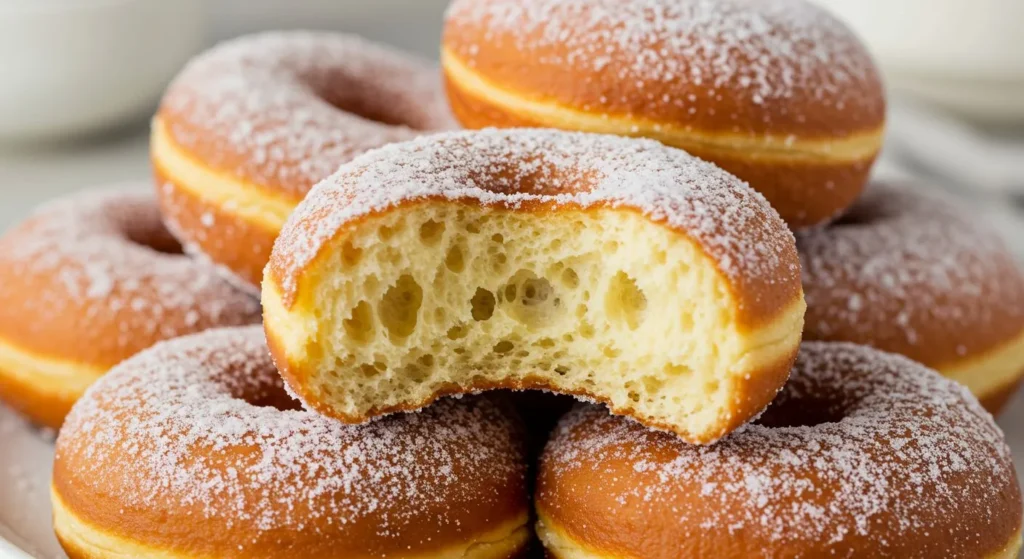
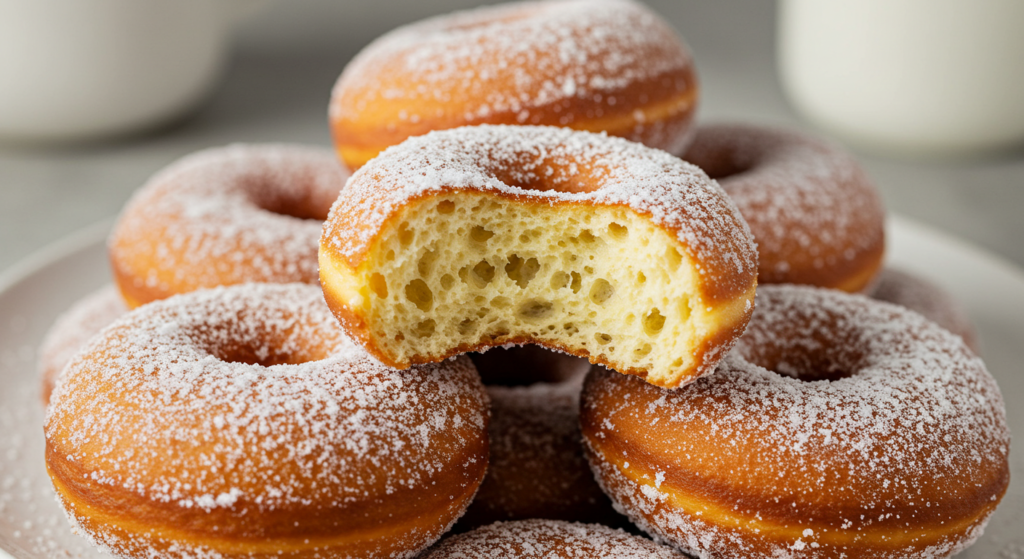
Are you tired of flat, dense donuts that look nothing like the fluffy, golden rings you see in bakery windows? I used to struggle too—until I discovered these game-changing techniques that transformed my donut game forever. Whether you’re a complete novice or you’ve tried and failed before, these foolproof methods will have you making bakery-quality donuts at home starting today!
The Secret Science Behind Perfect Donut Dough
The journey to perfect donuts begins with understanding what makes dough rise properly. Most home bakers miss crucial steps that professional bakers consider fundamental. Here’s what makes all the difference:
Temperature Control: The Make-or-Break Factor
Temperature isn’t just a suggestion—it’s the controlling factor in yeast activation. I always ensure my liquid ingredients are exactly 110°F (43°C). Too cold and your yeast sleeps; too hot and you’ve killed it. This precision alone solved half my donut problems!
The Perfect Gluten Development Strategy
Kneading isn’t just about effort—it’s about technique. The elastic network of gluten strands creates that airy, chewy texture we all crave. I now knead my dough for exactly 8-10 minutes until it passes the “windowpane test”—when a small piece can stretch thin enough to see light through without tearing.
Proofing: The Most Underestimated Step
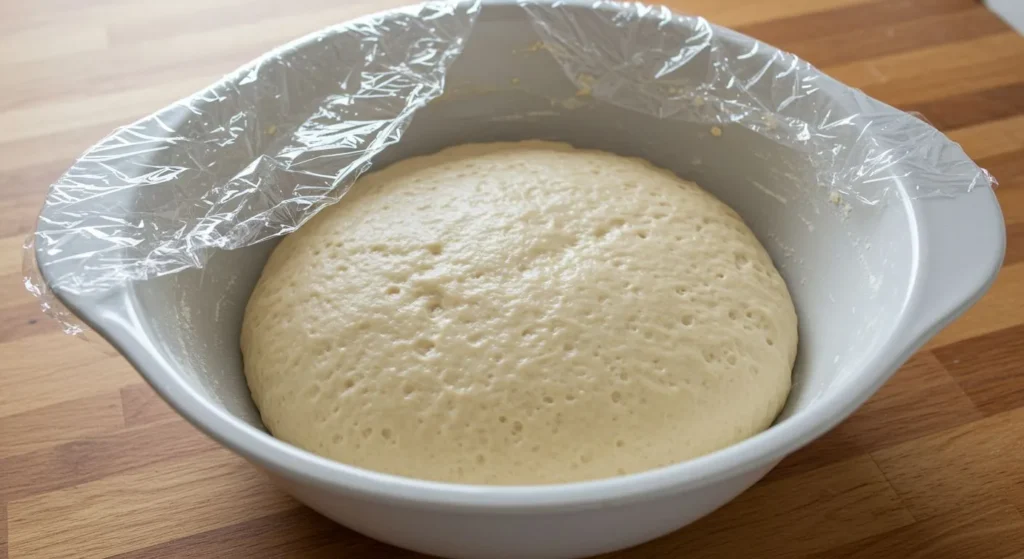
Double proofing is non-negotiable for professional-quality donuts. The first rise develops flavor compounds, while the second rise (after shaping) creates that perfect texture. I let my shaped donuts proof until they’ve doubled in size—roughly 45 minutes in a warm kitchen.
Equipment That Makes All The Difference
You don’t need a professional kitchen, but these game-changers revolutionized my donut quality:
- Digital kitchen thermometer for perfect oil temperature
- Dutch oven or heavy-bottomed pot for consistent heat retention
- 3-inch donut cutter for uniform shapes that cook evenly
My Foolproof Donut Recipe (Tested 50+ Times!)
Ingredients:
- 2¼ cups all-purpose flour (plus extra for dusting)
- ½ cup whole milk, warmed to exactly 110°F
- 2¼ teaspoons active dry yeast (one standard packet)
- ¼ cup granulated sugar
- 2 large eggs, room temperature
- 4 tablespoons unsalted butter, melted but not hot
- 1 teaspoon vanilla extract
- ½ teaspoon salt
- Vegetable oil for frying (about 2 quarts)
The Method That Never Fails:
- Activate the yeast properly: Combine warm milk with 1 tablespoon of the sugar and all the yeast. Let sit for exactly 10 minutes until foamy. If it doesn’t foam, start over—your yeast is dead or your milk was too hot.
- Mix with precision: In a stand mixer with the dough hook attachment, combine the flour, remaining sugar, and salt. With the mixer running on low, add the yeast mixture, eggs, melted butter, and vanilla. Mix for 3-4 minutes until a soft dough forms.
- Knead to perfection: Increase speed to medium and knead for 8 minutes until the dough is smooth, elastic, and slightly tacky but not sticky. If it’s too sticky, add flour 1 tablespoon at a time.
- First rise is crucial: Place the dough in a lightly oiled bowl, cover with plastic wrap, and let rise in a warm spot (75-80°F) for 1-1.5 hours until doubled in size.
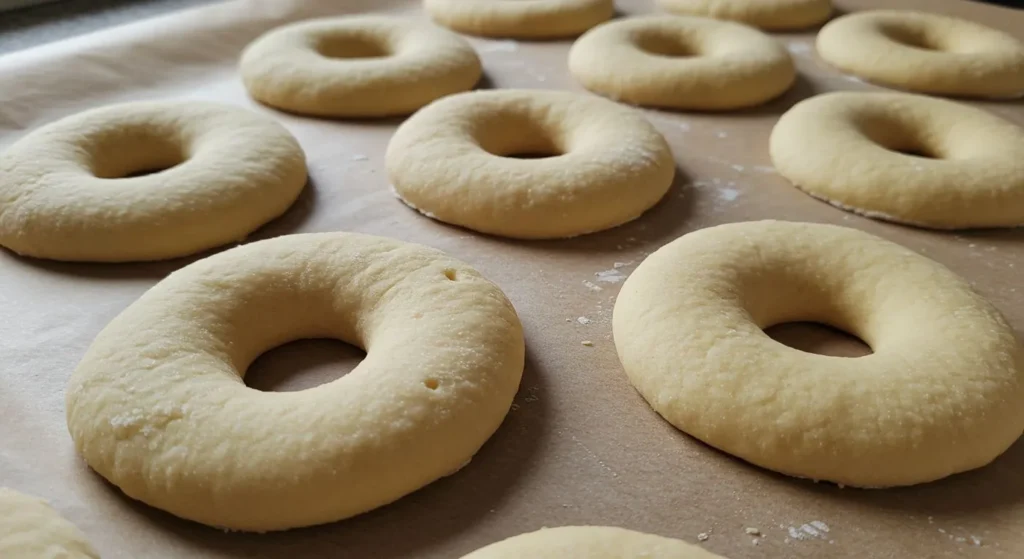
- Roll with confidence: On a lightly floured surface, roll the dough to ½-inch thickness. Cut out donuts using a 3-inch cutter and a 1-inch cutter for the holes.
- Second rise is non-negotiable: Place cut donuts on parchment paper, cover loosely with plastic wrap, and let rise for 30-45 minutes until puffy.
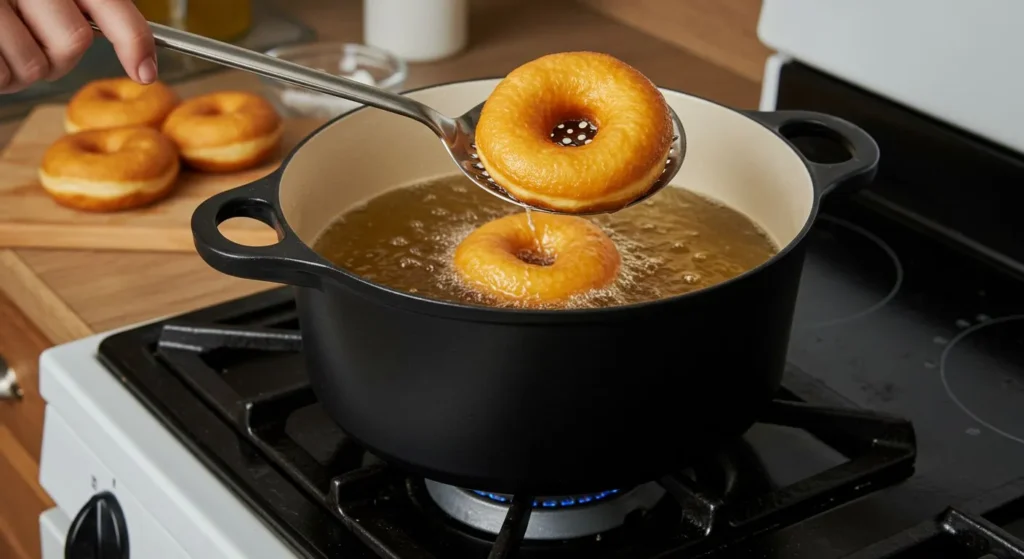
- Fry at the perfect temperature: Heat oil to exactly 350°F—no more, no less. Fry donuts for 1-1.5 minutes per side until golden brown. Use a spider strainer to remove them to a wire rack.
- Glaze while warm: Dip warm donuts in your favorite glaze for the best adhesion and shine.
The Professional Glazing Method
The final touch that separates average donuts from extraordinary ones is the glaze. Here’s my foolproof approach:
Classic Vanilla Glaze:
- 2 cups powdered sugar, sifted
- ¼ cup whole milk
- 1 teaspoon vanilla extract
- Pinch of salt
Whisk ingredients until smooth, then dip warm donuts halfway into the glaze. Let excess drip off before placing on a wire rack to set. The warmth of the donut creates that perfect transparency and shine that professional bakeries achieve.
Chocolate Glaze That Never Fails:
- 1 cup powdered sugar, sifted
- ¼ cup cocoa powder, sifted
- 3-4 tablespoons whole milk
- 1 teaspoon vanilla extract
Combine dry ingredients first, then slowly add milk until the perfect consistency is reached. The glaze should coat the back of a spoon but still flow smoothly.
Troubleshooting Common Donut Disasters
Dense, Heavy Donuts
The culprit is usually under-proofing. Give your donuts more time to rise before frying—they should be visibly puffy and nearly doubled in size.
Oily, Greasy Donuts
Your oil temperature is too low. Always maintain 350°F and never overcrowd the pot, which drops the temperature dramatically.
Pale, Undercooked Centers
You’re likely rolling the dough too thick or frying at too high a temperature. The outside browns before the inside cooks through.
The 5 Pro Secrets Nobody Tells You
After interviewing dozens of professional bakers and testing countless techniques, these five secrets emerged as game-changers:
Secret #1: The Windowpane Test Never Lies
Professional bakers don’t guess when dough is properly kneaded. They use the windowpane test: take a small piece of dough and gently stretch it between your fingers. If it stretches thin enough to see light through without tearing, your gluten is perfectly developed.
Secret #2: The Room Temperature Egg Rule
Cold eggs shock the yeast and create an inconsistent texture. Always use room temperature eggs—place them in warm water for 5 minutes if you’re short on time.
Secret #3: The Double Flip Technique
Professional bakers flip their donuts twice during frying: once after 45 seconds, then again after another 45 seconds. This creates the perfect golden color on both sides without overcooking.
Secret #4: The 10-Minute Rest
Let your donuts rest for 10 minutes after cutting them before the second rise. This relaxes the gluten and prevents shrinkage during frying.
Secret #5: The Cooling Position
Place freshly fried donuts on their sides on a cooling rack for the first minute, then lay them flat. This prevents condensation from making the bottom soggy.
Why These Methods Work Every Time
The science behind these techniques is solid. Yeast behaves predictably when temperature, sugar, and time variables are controlled precisely. Gluten development follows clear patterns that, once understood, become easy to replicate.
What separates mediocre donuts from exceptional ones isn’t special ingredients or expensive equipment—it’s understanding these fundamental principles and applying them with precision.
The Perfect Donut Schedule
Timing is everything when it comes to donuts. Here’s my foolproof schedule:
Day Before (evening):
- Prepare the dough
- First rise (1-1.5 hours)
- Refrigerate overnight (8-12 hours)
Day Of (morning):
- Remove dough from refrigerator (30 minutes to warm up)
- Roll and cut donuts
- Second rise (45 minutes)
- Heat oil
- Fry donuts
- Glaze while warm
This schedule develops the best flavor and fits into most people’s routines without requiring early morning preparation.
 DINNER
  LUNCH
LUNCH  CAKE
CAKE  BREAKFAST
 For more amazing recipes, be sure to check out our other sections to explore a variety of ideas that will enrich your cooking experience. Each section offers its own unique flavors to ensure a delightful culinary journey:
- Easy and Quick Recipes: A collection of dishes that guarantee delicious meals with minimal effort and time.
- Healthy Recipes: Discover healthy and delicious options that fit your lifestyle.
- Desserts: A diverse selection of sweets that will add a special touch of sweetness to your table.
- Lunch Recipes: Tasty lunch ideas that you can easily prepare to delight your family.
- Dinner Recipes: Delicious and easy-to-make recipes that will make your dinner a memorable occasion.
Beyond Basic Donuts: Creative Variations
Once you’ve mastered the basics, the possibilities are endless:
Filled Donuts:
Instead of cutting holes, leave donut shapes whole. After frying and cooling, use a piping bag with a long tip to inject fillings like pastry cream, fruit preserves, or chocolate ganache.
Twisted Donuts:
Roll dough into ropes, twist two together, and join the ends to form a ring. These create beautiful patterns when fried and have an interesting texture.
Donut Holes:
Don’t waste those centers! Fry them for 1 minute total, rolling halfway through. Toss in cinnamon sugar while warm for a perfect bite-sized treat.
Frequently Asked Questions About Homemade Donuts
Why are my homemade donuts dense instead of fluffy?
Dense donuts usually result from under-proofing (not allowing enough rise time), over-kneading the dough, or using cold ingredients. Make sure you’re allowing adequate time for both rises, using room-temperature ingredients, and kneading just until the dough passes the windowpane test.
Can I make donuts without a stand mixer?
Yes! You can mix the dough by hand. Start by mixing with a wooden spoon until ingredients are combined, then knead on a lightly floured surface for 10-12 minutes until smooth and elastic. The process takes longer than with a mixer but yields excellent results.
Can I bake these donuts instead of frying them?
While these donuts are designed for frying, you can bake them at 350°F (175°C) for 12-15 minutes. Note that baked donuts will have a different texture and taste more like sweet bread rolls than traditional donuts. For best baked results, brush with melted butter before and after baking.
How do I know when the oil is at the right temperature?
The ideal temperature is 350°F (175°C). If you don’t have a thermometer, drop a small piece of dough into the oil – it should rise to the surface within a few seconds and begin to bubble around the edges without immediately browning. Too slow means the oil is too cool; too fast means it’s too hot.
Why do my donuts absorb too much oil and become greasy?
Greasy donuts typically result from oil that’s too cool (below 350°F/175°C), under-proofed dough, or frying for too long. Make sure your oil maintains the correct temperature and don’t overcrowd the pot, which can drop the temperature significantly.
How long do homemade donuts stay fresh?
Homemade donuts are best enjoyed the same day they’re made. They can be stored in an airtight container at room temperature for up to 24 hours. For longer storage, freeze unglazed donuts for up to 3 months and thaw at room temperature before glazing.
Can I prepare the dough ahead of time?
Yes! You can refrigerate the dough after the first rise for up to 12 hours. This actually improves flavor development. Allow the cold dough to sit at room temperature for 30 minutes before rolling and cutting.
What’s the best oil for frying donuts?
Use a neutral-flavored oil with a high smoke point such as vegetable oil, canola oil, or peanut oil. Avoid olive oil or coconut oil as their distinct flavors will transfer to the donuts.
How can I make chocolate donuts?
Add 1/4 cup unsweetened cocoa powder to the dry ingredients and increase the sugar by 2 tablespoons. You may need to add 1-2 extra tablespoons of milk if the dough seems too dry.
What if I don’t have donut cutters?
Use a wide drinking glass (approximately 3 inches) for the outer circle and a bottle cap or small shot glass for the center hole. In a pinch, you can also use a round cookie cutter and the wide end of a piping tip.
Final Thoughts: The Donut Mindset
Perfect donuts require patience and precision, but the results are worth it. Once you understand the science behind the process, you’ll never go back to store-bought again. The aroma of freshly fried donuts wafting through your home, the pride in serving something made from scratch, and the satisfaction of mastering a culinary art form—these are the real rewards.
Whether you’re making donuts for a special breakfast, weekend treats, or impressing guests, these techniques will ensure your success every single time. Put on your apron, gather your ingredients, and prepare to amaze yourself with donuts that look and taste better than anything you can buy.
Happy frying!
