Table of Contents
There’s something magical about the aroma of freshly baked puff pastry wafting through the kitchen – it instantly transports me back to my grandmother’s cozy kitchen, where I first learned the art of creating these buttery, flaky layers. As Jowel, a passionate home cook with over fifteen years of experience, I’ve spent countless hours perfecting this Grandma’s puff pastry recipe that has been passed down through generations in my family.
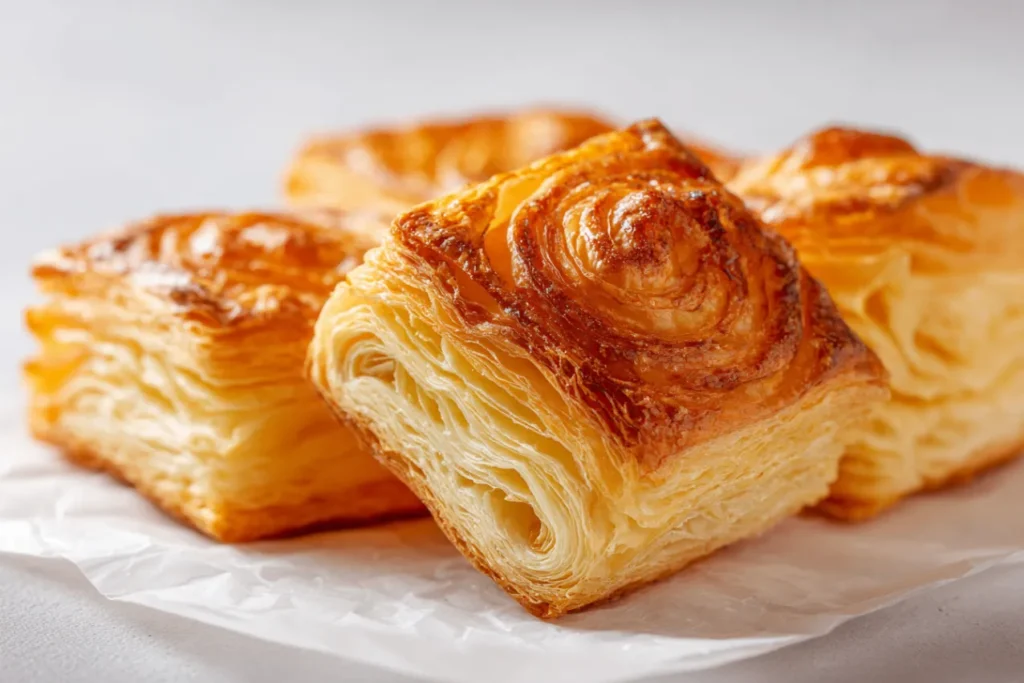
This traditional homemade puff pastry isn’t just a recipe; it’s a labor of love that connects us to our culinary heritage. While store-bought versions might seem convenient, nothing compares to the satisfaction of creating your own flaky puff pastry from scratch. The process might seem intimidating at first, but with patience and the right techniques, you’ll discover that making authentic puff pastry at home is not only achievable but incredibly rewarding.
Throughout this comprehensive guide, I’ll share every secret I’ve learned over the years, from choosing the right ingredients to mastering the folding technique that creates those signature layers. Whether you’re planning to use this versatile pastry dough for savory tarts, sweet pastries, or elegant appetizers, this recipe will become your go-to foundation for countless culinary creations.
Ingredients: The Foundation of Perfect Puff Pastry
Key Ingredients and Their Essential Roles
Creating exceptional Grandma’s puff pastry starts with understanding each ingredient’s crucial role in the final product. After years of experimentation, I’ve learned that the quality of your ingredients directly impacts the texture and flavor of your finished pastry.
All-Purpose Flour (500g): This forms the structural backbone of our pastry. I always use unbleached all-purpose flour with a moderate protein content (around 10-12%). This provides enough gluten development for structure while maintaining the tender texture we’re after. Avoid high-protein bread flour, which can make your pastry tough.
Cold Butter (250g): The star of our flaky puff pastry recipe! The butter creates those beautiful layers through a process called lamination. I cannot stress enough how important it is to keep the butter cold throughout the process. I cut my butter into cubes the night before and keep them refrigerated until use.
Salt (1 teaspoon): Don’t underestimate this humble ingredient. Salt enhances flavor and strengthens the gluten network, contributing to the pastry’s structure. I prefer fine sea salt for its clean taste and easy incorporation.
Ice-Cold Water (200ml): The temperature here is critical. Cold water helps maintain the butter’s firmness during mixing, preventing it from melting into the flour too quickly. I actually add a few ice cubes to my water and let it sit for 10 minutes before measuring.
How to Choose High-Quality Ingredients
Through years of making this traditional puff pastry, I’ve learned that ingredient quality makes a noticeable difference. For butter, I always choose European-style butter with at least 82% fat content – it creates superior layers and richer flavor. When selecting flour, look for brands that specify their protein content on the package.
The water quality matters too. If your tap water has a strong chlorine taste, use filtered water instead. I’ve found that heavily chlorinated water can sometimes interfere with gluten development, affecting the pastry’s final texture.
Substitutions That Actually Work
Over the years, I’ve tested numerous substitutions when ingredients weren’t available, and here’s what I’ve learned works well:
Butter alternatives: While nothing truly replaces butter’s flavor and lamination properties, high-quality margarine with similar fat content can work in a pinch. Avoid low-fat spreads – they contain too much water and won’t create proper layers.
Flour substitutions: You can replace up to 25% of the all-purpose flour with pastry flour for an even more tender result. However, avoid substituting more than this, as you’ll lose structural integrity.
Salt variations: Kosher salt works perfectly, just use slightly less (about 3/4 teaspoon) since the crystals are larger. Avoid flavored or colored salts for this basic recipe.
Preparation Steps: Mastering the Technique
How I Prepare Before Cooking
Successful homemade puff pastry requires proper preparation and timing. I always start by organizing my workspace and chilling all my tools – even my mixing bowl goes in the refrigerator for 15 minutes before I begin. This extra step helps maintain the crucial cold temperature throughout the process.
I also prepare my workspace with parchment paper and have extra flour ready for dusting. Having everything within reach prevents interruptions that could warm up the dough. Trust me, after years of making this recipe, these small details make a significant difference in the final result.
Step-by-Step Instructions with Professional Tips
Step 1: Creating the Base Mixture In your chilled large bowl, whisk together the flour and salt. This ensures even distribution before adding the butter. Add the cold butter cubes and work quickly with your fingertips to crumble the butter into the flour. You’re aiming for a coarse crumb texture with some larger butter pieces still visible – these create the flaky layers we love in authentic puff pastry.
Professional tip: Don’t overwork this step. Some visible butter pieces are actually desirable – they’ll create steam pockets during baking, contributing to the pastry’s rise and flakiness.
Step 2: Incorporating the Water Make a well in the center of your flour-butter mixture and gradually add the ice-cold water. Using a fork or your hands, gently bring the mixture together. The dough should be shaggy and slightly sticky – resist the urge to add more water if it seems dry initially.
Professional tip: Add the water gradually and stop as soon as the dough holds together. Too much water creates tough pastry, while too little prevents proper gluten development.
Step 3: Developing the Dough Transfer your shaggy dough to a lightly floured surface and knead gently for 2-3 minutes. You’re not looking for smooth perfection here – just enough handling to bring the dough together into a cohesive mass that’s smooth and slightly elastic.
Professional tip: Use the heel of your hand to push the dough away from you, then fold it back. This technique, called fraisage, helps distribute the butter without overworking the gluten.
Step 4: The Crucial Rest Period Shape your dough into a ball, wrap tightly in plastic wrap, and refrigerate for at least 30 minutes. This rest period allows the gluten to relax and the butter to firm up again – both essential for successful rolling and lamination.
Professional tip: I often make my dough the day before and let it rest overnight. This extended rest improves both flavor and workability.
Common Mistakes to Avoid
After years of teaching this Grandma’s puff pastry recipe to friends and family, I’ve identified the most common pitfalls:
Warm ingredients: This is the number one mistake I see. Warm butter will blend too completely with the flour, eliminating the distinct layers that make puff pastry special. If your kitchen is particularly warm, work in shorter intervals and return the dough to the refrigerator as needed.
Overworking the dough: Excessive kneading develops too much gluten, resulting in tough, chewy pastry instead of tender, flaky layers. Handle the dough just enough to bring it together.
Skipping the rest period: Impatience here leads to disaster. The dough needs time for the gluten to relax and the butter to firm up. Rushed pastry will shrink during baking and won’t achieve proper layers.
Inadequate flour dusting: While you don’t want to incorporate too much extra flour, insufficient dusting causes sticking, tearing, and uneven rolling. Keep your work surface and rolling pin lightly dusted throughout the process.
Serving & Final Touches
Beautiful and Creative Presentation Ideas
This versatile puff pastry dough transforms into countless elegant presentations. For savory applications, I love creating individual tart shells filled with caramelized onions and goat cheese, or classic cheese straws twisted with fresh herbs. The golden, flaky texture provides a beautiful contrast to colorful fillings.
For sweet presentations, try cutting the pastry into decorative shapes before baking – stars, hearts, or braided designs add visual appeal. A light egg wash before baking creates that coveted golden sheen that makes any pastry look professionally made.
One of my favorite techniques is creating “pastry roses” by rolling thin strips of dough and shaping them into flower-like forms. These make stunning garnishes for both sweet and savory dishes and never fail to impress guests.
Best Sides and Pairings
This traditional puff pastry pairs beautifully with both robust and delicate flavors. For savory applications, I love pairing it with rich, creamy fillings like mushroom duxelles or herb-crusted salmon. The buttery pastry balances these intense flavors perfectly.
For sweet applications, seasonal fruits shine when encased in this flaky pastry. Apple turnovers, pear tarts, and berry galettes all benefit from the pastry’s neutral flavor that lets the fruit take center stage. A light dusting of powdered sugar or a drizzle of simple glaze adds the perfect finishing touch.
Storing and Reheating Leftovers Safely
Proper storage is crucial for maintaining the quality of your homemade puff pastry. Unbaked dough can be wrapped tightly and refrigerated for up to 3 days or frozen for up to 3 months. I like to portion the dough before freezing, wrapping individual portions that I can thaw as needed.
Baked pastry items should be stored at room temperature in an airtight container for up to 2 days. For longer storage, wrap carefully and freeze for up to 1 month. To refresh day-old pastry, place it in a 350°F oven for 5-10 minutes to restore crispness.
Frequently Asked Questions
1. Can I prepare this puff pastry recipe in advance? Absolutely! This is one of my favorite make-ahead recipes. The dough actually improves with an overnight rest in the refrigerator, as the flour fully hydrates and the flavors develop. You can prepare the dough up to 3 days ahead or freeze it for up to 3 months. Just remember to thaw frozen dough gradually in the refrigerator before rolling.
2. What’s the best way to store leftover puff pastry? For unbaked dough, wrap tightly in plastic wrap and refrigerate for up to 3 days. For longer storage, wrap in plastic wrap and then foil before freezing for up to 3 months. Baked pastry items stay fresh at room temperature for 1-2 days in an airtight container, or can be frozen for up to 1 month.
3. How can I make this puff pastry recipe healthier? While puff pastry is inherently rich due to its butter content, you can make small modifications. Try replacing up to 25% of the all-purpose flour with whole wheat pastry flour for added fiber. You can also reduce the salt slightly if you’re watching sodium intake. However, avoid major substitutions that will compromise the pastry’s structure and flakiness.
4. Can I double the ingredients for a larger batch? Yes, this recipe doubles beautifully! I often make double batches and freeze portions for future use. Just be sure to work in a large enough bowl and don’t try to roll all the dough at once – divide it into manageable portions. The timing for chilling and resting remains the same regardless of batch size.
5. What’s the biggest mistake people make with homemade puff pastry? The most common mistake I see is working with warm ingredients or in a too-warm kitchen. Temperature control is absolutely crucial for success. If your butter starts to soften during preparation, pop the bowl in the refrigerator for 10-15 minutes. Also, don’t skip the resting periods – they’re essential for proper texture and workability.
 DINNER
 LUNCH
LUNCH CAKE
CAKE BREAKFAST
For more amazing recipes, be sure to check out our other sections to explore a variety of ideas that will enrich your cooking experience. Each section offers its own unique flavors to ensure a delightful culinary journey:
- Easy and Quick Recipes: A collection of dishes that guarantee delicious meals with minimal effort and time.
- Healthy Recipes: Discover healthy and delicious options that fit your lifestyle.
- Desserts: A diverse selection of sweets that will add a special touch of sweetness to your table.
- Lunch Recipes: Tasty lunch ideas that you can easily prepare to delight your family.
- Dinner Recipes: Delicious and easy-to-make recipes that will make your dinner a memorable occasion.
Conclusion
Creating Grandma’s puff pastry from scratch is more than just following a recipe – it’s about connecting with culinary traditions and experiencing the joy of creating something truly special with your own hands. This time-honored technique, passed down through generations, continues to bring families together around the kitchen table.
I encourage you to embrace the process, even if your first attempt isn’t perfect. Like any traditional skill, making exceptional puff pastry improves with practice. Each time you make this recipe, you’ll develop a better feel for the dough and gain confidence in the techniques.
I’d love to hear about your experiences with this authentic puff pastry recipe! Please leave a comment below sharing how your pastry turned out, any creative ways you’ve used it, or questions you might have. Don’t forget to share photos of your beautiful creations – there’s nothing more satisfying than seeing this traditional recipe come to life in kitchens around the world.
Happy baking, and remember – every master baker started with their first batch of homemade pastry!