Introduction
Hey there, fellow food lovers! I’m Jowel, and today I want to share something incredibly close to my heart – the magic of chicken bones. I know, I know, it might sound odd to get excited about bones, but hear me out!
Growing up in my grandmother’s kitchen, I watched her religiously save every single chicken bone. “Nothing goes to waste, Jowel,” she’d always say, dropping those bones into a pot that seemed to perpetually simmer on her stove. Back then, I thought she was just being frugal. Little did I know she was creating liquid gold – bone broth that would become the foundation of countless memorable meals and the secret to our family’s robust health.
Years later, as I dove deeper into the culinary world, I discovered that chicken bones are truly one of the most undervalued ingredients in our kitchens. They’re packed with nutrients, collagen, and incredible flavor that can transform simple dishes into restaurant-quality masterpieces. Whether you’re looking to boost your family’s nutrition, create the most flavorful stocks, or simply reduce food waste, understanding how to properly use chicken bones will revolutionize your cooking.
This comprehensive guide will walk you through everything you need to know about chicken bones – from selecting the right types to creating the most nourishing bone broth your family has ever tasted. Trust me, once you start incorporating these techniques into your cooking routine, you’ll never look at those leftover bones the same way again!

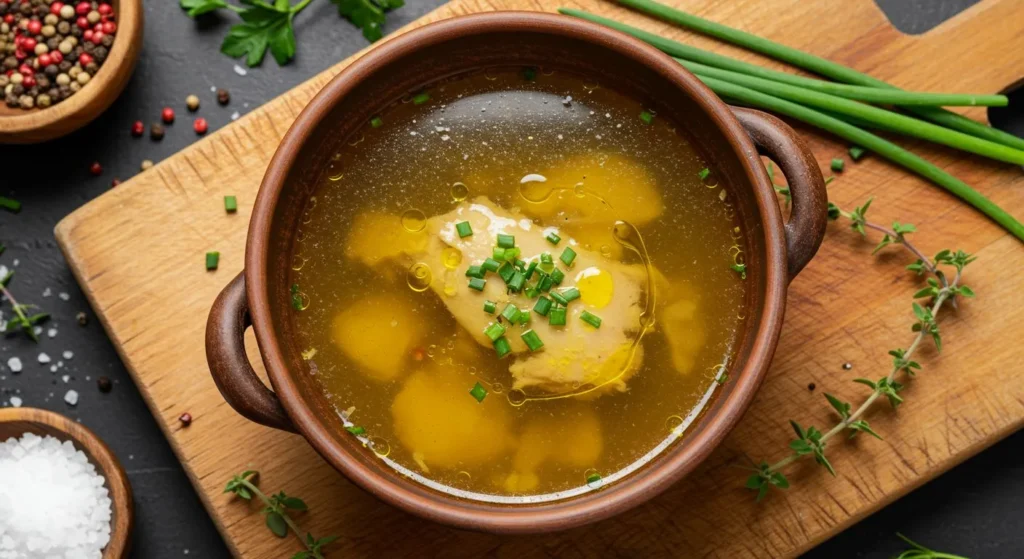
Perfect Chicken Bone Broth
Learn to make nutrient-rich chicken bone broth that gels perfectly every time using this comprehensive guide with professional tips and techniques.
Ingredients
Instructions
- 1If using raw bones, blanch in boiling water for 3-5 minutes, then rinse. Roast all bones at 425°F for 30-45 minutes until golden.
- 2Place bones in large pot, add vinegar, let sit 30 minutes. Cover with cold water by 2 inches.
- 3Bring to gentle simmer (tiny bubbles only), skim foam regularly for first hour. Simmer 12-24 hours.
- 4In final 2-3 hours, add vegetables and herbs. Continue gentle simmer.
- 5Strain through fine mesh, cool quickly in ice bath, refrigerate up to 7 days or freeze up to 6 months.
Understanding Your Chicken Bones: Types, Selection, and Quality
The Different Types of Chicken Bones and Their Unique Benefits
Not all chicken bones are created equal, and understanding the differences can dramatically impact your culinary results. When I first started experimenting with bone broth, I made the mistake of thinking any bone would do. Boy, was I wrong!
Raw bones are your premium choice for bone broth. These haven’t been cooked yet, so they retain maximum collagen, marrow, and nutrients. The joints, knuckles, and feet are particularly rich in gelatin-producing compounds. When you see that beautiful gel-like consistency in your finished broth, you’ll know you’ve extracted all those wonderful nutrients.
Cooked bones from your Sunday roast or weeknight dinner are still valuable, though they won’t produce quite as much gelatin. However, they bring incredible flavor depth that raw bones alone can’t match. I always save bones from rotisserie chickens, roasted birds, and even the carcass from chicken breasts or thighs.
Mixed bone combinations create the most complex and satisfying broths. I typically use about 60% raw bones for nutrition and gelatin, and 40% cooked bones for that rich, developed flavor. The wings, backs, and necks are goldmines for collagen, while the larger leg and thigh bones contribute wonderful marrow.
Selecting the Highest Quality Chicken Bones for Maximum Benefits
The quality of your chicken bones directly impacts both the nutritional value and flavor of your final product. After years of experimenting, I’ve learned that sourcing matters tremendously.
Pasture-raised chicken bones are my absolute top choice. These birds lived natural lives, eating bugs, grass, and supplemental organic feed. Their bones are denser, more nutrient-rich, and produce broths with superior gelatin content. Yes, they cost more, but the difference in both taste and nutrition is remarkable.
Organic chicken bones are my second choice. While these chickens may not have had access to pasture, they weren’t exposed to antibiotics, hormones, or conventional feed loaded with pesticides. The bones from organic chickens consistently produce cleaner-tasting, more nutritious broths.
Conventional chicken bones can still make good broth, especially when you’re just starting out. Look for bones from chickens raised without antibiotics if possible. Even grocery store rotisserie chicken bones can create delicious broth – I’ve made countless batches this way!
When selecting bones, look for those that still have some meat and cartilage attached. These add extra flavor and nutrition. Avoid bones that look dried out or have an off smell. Fresh bones should have a clean, slightly metallic scent.
Smart Substitutions and Creative Alternatives
Sometimes you might not have access to ideal chicken bones, or you want to experiment with different flavors. I’ve discovered several fantastic alternatives over the years that can create equally nutritious and delicious results.
Turkey bones work beautifully and are often more affordable, especially after holidays. They’re larger, so you’ll need fewer bones for the same amount of broth. The flavor is slightly richer and more robust than chicken.
Duck bones create an incredibly rich, almost luxurious broth. The higher fat content produces a more unctuous texture, perfect for sophisticated soups and sauces. Just be prepared for a more intense flavor profile.
Mixed poultry bones can create wonderfully complex broths. I often combine chicken with turkey or add some duck bones to chicken for depth. The key is maintaining the right ratios – too much duck can overpower the delicate chicken flavor.
For vegetarians or those avoiding poultry, mushroom and seaweed combinations can create surprisingly rich, umami-packed broths. While they won’t provide the same collagen benefits, they offer their own unique nutritional profiles and can satisfy that craving for a deeply satisfying broth.
Mastering the Art of Chicken Bone Preparation
Essential Preparation Techniques for Maximum Flavor Extraction
Proper preparation is where the magic begins, and it’s often the difference between good broth and extraordinary broth. Over the years, I’ve refined my preparation techniques to extract every ounce of flavor and nutrition from those precious chicken bones.
Roasting your bones is my secret weapon for developing deep, complex flavors. Even if you’re using cooked bones, a quick roast in a 425°F oven for 30-45 minutes works wonders. The bones should turn golden brown, and you’ll start smelling those incredible roasted aromatics. This step caramelizes any remaining meat and fat, creating compounds that add tremendous depth to your broth.
Blanching raw bones might seem counterintuitive, but it’s crucial for crystal-clear broth. Bring a large pot of water to boil, add your raw bones, and boil for 3-5 minutes. You’ll see foam and impurities rise to the surface. Drain the bones and rinse them under cold water, scrubbing away any remaining foam. This extra step ensures your final broth will be clean and clear, not cloudy or greasy.
Cracking larger bones helps expose the marrow and allows for better extraction. I use a heavy cleaver or ask my butcher to crack the larger leg bones. Don’t worry about making perfect cuts – you just want to create some openings for the marrow to escape during cooking.
The acid trick is something I learned from a French chef friend. Adding a splash of apple cider vinegar or white wine to your bones and letting them sit for 30 minutes before cooking helps break down the bones slightly, allowing for better mineral extraction. Don’t worry – you won’t taste the acid in the final product.
Step-by-Step Bone Broth Mastery with Professional Tips
Creating perfect bone broth is both art and science, and I’m excited to share the exact method I’ve perfected over years of practice. This technique consistently produces rich, gelatinous, deeply flavorful broth that will elevate every dish you make.
Step 1: Setup and Initial Cooking Place your prepared bones in a large stockpot or slow cooker. I prefer using about 3-4 pounds of bones for a 6-8 quart pot. Add your acid (2 tablespoons apple cider vinegar) and let sit for 30 minutes. Cover the bones with cold, filtered water by about 2 inches. Starting with cold water helps extract more nutrients as it slowly heats up.
Step 2: The Critical First Hours Bring the water to a very gentle simmer – not a rolling boil! This is crucial. Aggressive boiling will create a cloudy, greasy broth. You want just tiny bubbles breaking the surface. This slow, gentle simmer allows for maximum extraction without breaking down the proteins that cause cloudiness. Plan for this to take 45-60 minutes to reach the right temperature.
Step 3: The Long, Slow Magic Now comes the patience part. Let your broth simmer gently for 12-24 hours for chicken bones (beef bones need longer, but chicken bones give up their goodness more easily). I usually start my broth in the evening and let it go overnight and into the next day. Check periodically to ensure the water level stays above the bones, adding hot water as needed.
Step 4: Aromatics and Final Touches In the last 2-3 hours of cooking, add your aromatics: roughly chopped onions, carrots, celery, herbs like parsley, thyme, and bay leaves, and maybe some peppercorns. Adding these too early can make them bitter and cloudy your broth. This timing gives you beautiful flavor without any unwanted effects.
Professional Tips I’ve Learned:
- Never let your broth boil hard – it ruins everything
- Taste your broth after 12 hours; you’ll be amazed at the transformation
- Don’t add salt during cooking – save seasoning for when you use the broth
- A properly made broth will gel when refrigerated – that’s the good stuff!
Common Mistakes That Sabotage Your Bone Broth (And How to Fix Them)
After making thousands of batches of bone broth and teaching countless others, I’ve seen every mistake in the book. Let me save you from the heartbreak of subpar broth by sharing the most common pitfalls and their simple solutions.
Mistake #1: Boiling Too Aggressively This is the number one broth killer! I see people cranking up the heat thinking it will speed up the process. All it does is create a greasy, cloudy mess that tastes flat. The violent bubbling breaks apart the proteins and fat, creating an emulsion that’s impossible to clarify. Keep it at the gentlest simmer possible – those tiny, lazy bubbles are your friend.
Mistake #2: Not Using Enough Bones Skimping on bones is like trying to make coffee with one bean. You need a good bone-to-water ratio for rich, gelatinous broth. I use about 3-4 pounds of bones per gallon of water. If your finished broth doesn’t gel when cold, you likely didn’t use enough bones or didn’t cook it long enough.
Mistake #3: Adding Aromatics Too Early I used to throw everything in at once, thinking longer cooking meant better flavor. Wrong! Vegetables and herbs become bitter and muddy when cooked for 24 hours. Add them only in the final 2-3 hours for bright, clean flavors that complement rather than compete with your beautiful bone broth base.
Mistake #4: Inadequate Skimming During the first hour of cooking, foam and impurities will rise to the surface. Skimming these off regularly (every 15-20 minutes initially) prevents them from being reincorporated into your broth. Use a ladle or fine-mesh skimmer, and don’t worry about getting every tiny bit – just get the obvious foam.
Mistake #5: Improper Storage I’ve seen people ruin perfect broth with poor storage. Cool your broth quickly in an ice bath before refrigerating. Store in small portions for easy use. Properly made and stored bone broth keeps 5-7 days refrigerated or up to 6 months frozen. Always reheat gently – never boil your finished broth!
Serving, Storing, and Maximizing Your Chicken Bone Investment
Creative Presentation Ideas That Showcase Bone Broth Benefits
Now that you’ve created this liquid gold, let’s talk about showcasing it in ways that will have your family and friends begging for your secrets. Bone broth isn’t just a base ingredient – it’s a star that deserves center stage!
Elegant Bone Broth Sipping Serve your broth in warmed mugs or small bowls as a sophisticated appetizer. I love garnishing with a drizzle of good olive oil, fresh herbs like chives or parsley, and a sprinkle of sea salt. For special occasions, add a few drops of truffle oil or a small dollop of crème fraîche. The rich, gelatinous texture and deep flavor create an incredibly satisfying and nourishing experience.
Ramen Revolution at Home Use your bone broth as the base for homemade ramen that rivals any restaurant. The collagen-rich broth creates that luxurious mouthfeel that makes great ramen unforgettable. Top with soft-boiled eggs, fresh scallions, and your choice of proteins. The depth of flavor from properly made bone broth transforms simple ramen into a gourmet experience.
Risotto Game-Changer Replace regular stock with warm bone broth in your risotto for incredible richness and nutrition. The gelatin helps create that perfect creamy texture without excessive butter or cream. I’ve served bone broth risotto to guests who couldn’t stop raving about the depth of flavor. It’s become my signature dish for dinner parties.
Gravy and Sauce Excellence Use bone broth as the base for gravies, pan sauces, and reductions. The natural gelatin content means your sauces will have beautiful body and shine without flour or other thickeners. Even simple pan sauces become restaurant-quality when you deglaze with bone broth instead of wine or regular stock.
Perfect Pairings and Complementary Dishes
Understanding what foods complement bone broth best will help you create memorable meals that highlight all the work you’ve put into creating this nutritious foundation.
Traditional Comfort Food Pairings Bone broth shines in classic comfort foods. Use it for chicken and dumplings, where the rich broth enhances both the tender chicken and fluffy dumplings. Homemade chicken noodle soup becomes transcendent when made with proper bone broth – the difference is absolutely remarkable. Even simple mashed potatoes become extraordinary when you add bone broth instead of milk.
International Flavor Adventures Branch out with international dishes that traditionally rely on good stock. Vietnamese pho benefits tremendously from rich bone broth, as does Italian stracciatella (egg drop soup). French onion soup reaches new heights when built on a foundation of quality bone broth. These dishes showcase how bone broth enhances rather than overpowers other flavors.
Grain and Vegetable Pairings Cook your grains in bone broth instead of water for incredible flavor and nutrition boosts. Rice, quinoa, barley, and farro all benefit from this treatment. Braised vegetables like carrots, leeks, and fennel become sweet and tender when cooked in bone broth. Even simple steamed vegetables get a nutrition boost when finished with a splash of warm bone broth.
Seasonal Menu Planning In cooler months, bone broth-based soups and stews provide comfort and nutrition. Spring calls for lighter preparations – perhaps a delicate vegetable soup with bone broth base. Summer might feature chilled bone broth soups (yes, they’re delicious cold!). Fall and winter are perfect for hearty bone broth-based dishes that warm you from the inside out.
Storage Solutions and Reheating Wisdom for Long-Term Success
Proper storage and reheating techniques ensure you get maximum value from your bone broth investment while maintaining food safety and optimal flavor.
Refrigeration Best Practices Cool your bone broth quickly by placing the pot in an ice bath, stirring occasionally until it reaches room temperature. This prevents bacterial growth and helps maintain flavor. Store in the refrigerator for up to one week. The broth should gel completely when cold – this is your indicator of successful collagen extraction. Don’t worry if it looks like Jell-O; it will become liquid again when heated.
Freezing for Long-Term Storage Freeze bone broth in various portion sizes for maximum convenience. I use ice cube trays for small amounts (perfect for deglazing pans), mason jars for individual servings, and larger containers for family meals. Leave about an inch of headspace in containers to allow for expansion. Properly frozen bone broth maintains quality for 6-8 months.
Smart Portioning Strategies Think about how you typically use broth and portion accordingly. I freeze some in 1-cup portions for recipes, 2-cup portions for soups, and larger quantities for big cooking projects. Label everything with dates and contents – trust me, three months later you won’t remember what that mystery container contains!
Reheating Without Compromise Never boil your finished bone broth when reheating – gentle warming preserves the delicate flavors and textures you worked so hard to develop. Heat slowly over medium-low heat, stirring occasionally. For frozen broth, thaw overnight in the refrigerator when possible, or use the defrost setting on your microwave for quick thawing.
Quality Control and Safety Always smell your broth before using. Good bone broth should have a rich, savory aroma. Any off smells indicate spoilage. Properly made and stored bone broth rarely spoils quickly due to its natural preservative properties, but food safety always comes first. When in doubt, discard it and make a fresh batch.
 DINNER
 LUNCH
LUNCH CAKE
CAKE BREAKFAST
For more amazing recipes, be sure to check out our other sections to explore a variety of ideas that will enrich your cooking experience. Each section offers its own unique flavors to ensure a delightful culinary journey:
- Easy and Quick Recipes: A collection of dishes that guarantee delicious meals with minimal effort and time.
- Healthy Recipes: Discover healthy and delicious options that fit your lifestyle.
- Desserts: A diverse selection of sweets that will add a special touch of sweetness to your table.
- Lunch Recipes: Tasty lunch ideas that you can easily prepare to delight your family.
- Dinner Recipes: Delicious and easy-to-make recipes that will make your dinner a memorable occasion.
Frequently Asked Questions About Chicken Bones and Bone Broth
Q: How long should I cook chicken bones to get maximum nutritional benefits?
A: For chicken bones, 12-24 hours of gentle simmering extracts optimal nutrition and collagen. I’ve found that 18-20 hours hits the sweet spot – long enough to extract all the good stuff but not so long that the flavor becomes overly concentrated. You’ll know you’ve done it right when your cooled broth gels completely. Remember, the key is maintaining a very gentle simmer, not a rolling boil.
Q: Can I reuse chicken bones to make multiple batches of broth?
A: While you can technically use bones twice, the second batch will be significantly weaker in both flavor and nutrition. I recommend using fresh bones for each batch to ensure you’re getting maximum benefits. However, if you want to stretch your bone investment, you can combine used bones with fresh ones for your next batch – just use about 70% fresh bones and 30% previously used ones.
Q: What’s the difference between bone broth and regular chicken stock?
A: The main differences are cooking time, bone-to-water ratio, and resulting nutrition. Bone broth cooks much longer (12-24 hours vs. 3-4 hours for stock), uses more bones, and results in higher collagen, gelatin, and mineral content. Stock often includes more vegetables and herbs throughout cooking, while bone broth focuses on extracting everything possible from the bones first. Bone broth should gel when cold, while stock typically remains liquid.
Q: Is it safe to cook bone broth for such long periods?
A: Absolutely! The long, gentle cooking process is completely safe when done properly. The key is maintaining proper temperature (just barely simmering) and occasionally checking water levels. Many cultures have been making long-cooked bone broths for centuries. Just ensure your pot maintains temperature and doesn’t go dry. If you’re nervous about leaving it overnight, a slow cooker on low setting is a great alternative.
Q: How can I make my bone broth more flavorful without making it salty?
A: Great question! Roasting your bones first adds incredible depth without salt. Adding aromatics (onions, carrots, celery, herbs) in the final 2-3 hours of cooking provides flavor without bitterness. A splash of apple cider vinegar helps extract minerals and adds subtle complexity. Avoid adding salt during cooking – instead, season individual portions when serving. You can also add umami-rich ingredients like mushrooms or a small piece of kombu seaweed for depth without saltiness.
Transform Your Kitchen Today: Your Bone Broth Journey Starts Now
As we wrap up this comprehensive guide to chicken bones and their incredible benefits, I hope you’re feeling inspired to transform those kitchen scraps into liquid nutrition. The journey from seeing bones as waste to recognizing them as valuable ingredients is truly transformative – not just for your cooking, but for your family’s health and your connection to traditional foodways.
Remember, every expert was once a beginner. My first batch of bone broth was mediocre at best, but each attempt taught me something new. Don’t be discouraged if your first try isn’t perfect – embrace the learning process and celebrate small improvements. The most important step is simply starting.
I encourage you to begin this weekend. Save those bones from your next roasted chicken, gather your ingredients, and commit to that first long, slow simmer. Share your experience with friends and family – you might be surprised how many people are curious about bone broth but haven’t taken the plunge yet.
The benefits extend far beyond nutrition. There’s something deeply satisfying about creating nourishing food from what others might discard. It connects us to generations of cooks who understood that nothing valuable should be wasted, and that the most nutritious foods often require patience and care.
Start your bone broth adventure today, and I promise you’ll never look at chicken bones the same way again. Here’s to your health, your kitchen success, and the delicious journey ahead!
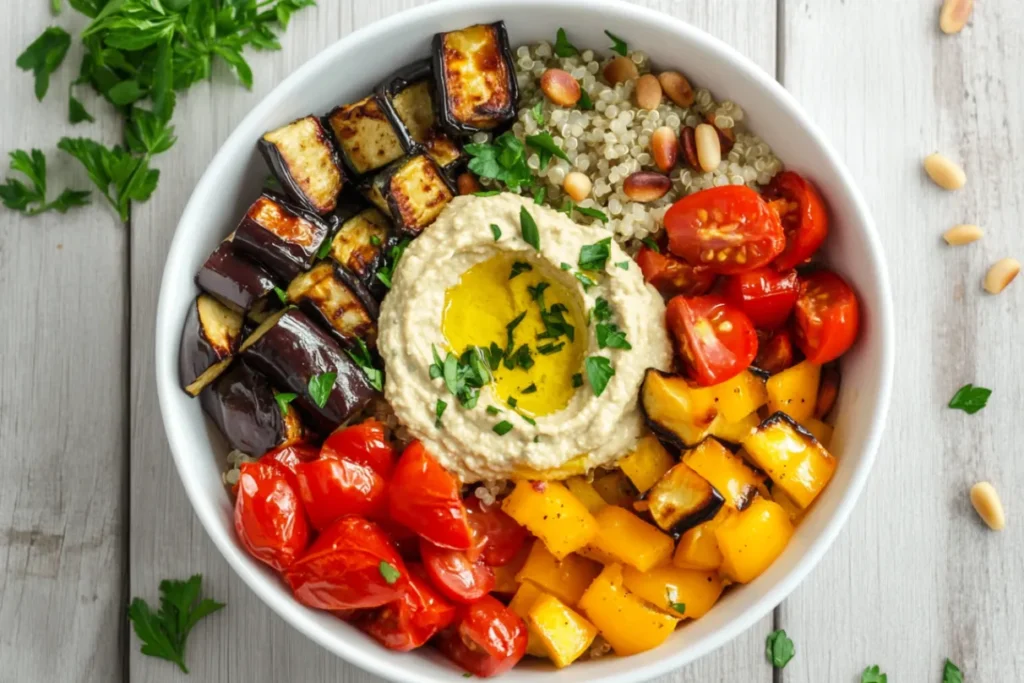
Healthy Summer Recipe for a Fresh and Nutritious Meal: Quinoa Power Bowl

Classic Vanilla Cheesecake – My Homemade Twist Inspired by Anna Olson

The Ultimate Coronation Chicken Recipe: A Royal Dish Made Simple
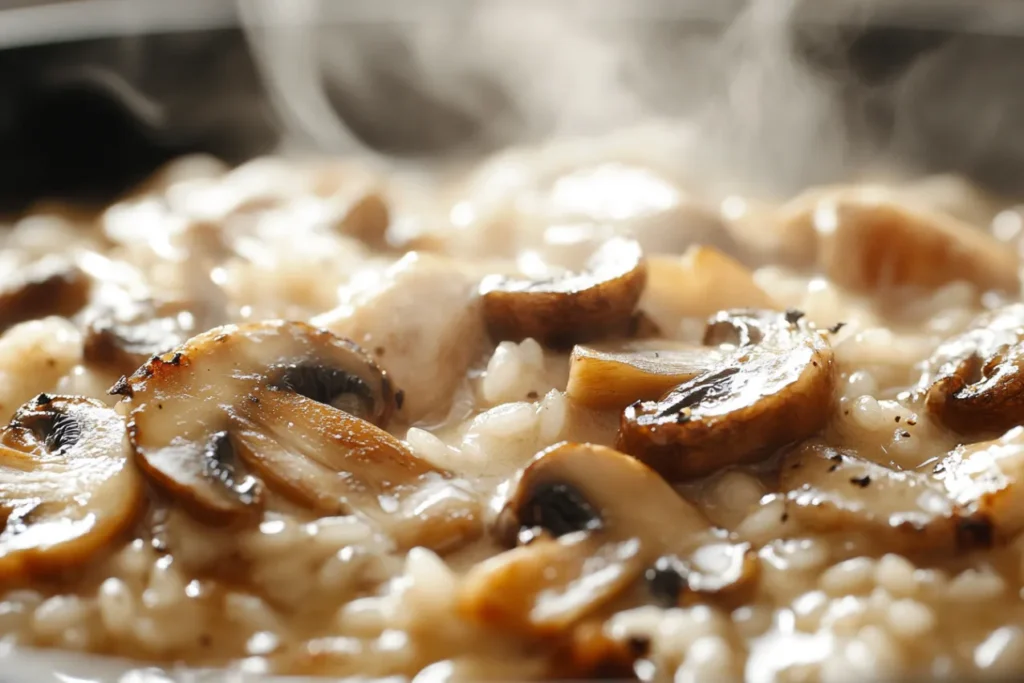
Creamy Mushroom and Chicken Risotto: A Family Favorite That Never Fails
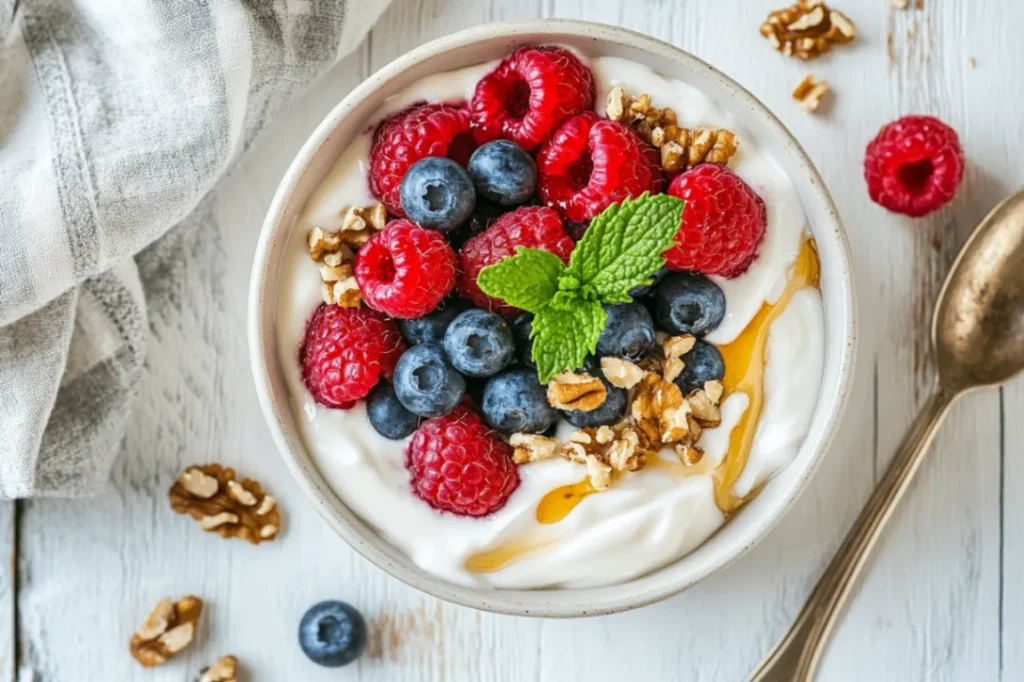
Health Benefits Greek Yogurt: Your Complete Guide to Nature’s Protein Powerhouse