Table of Contents
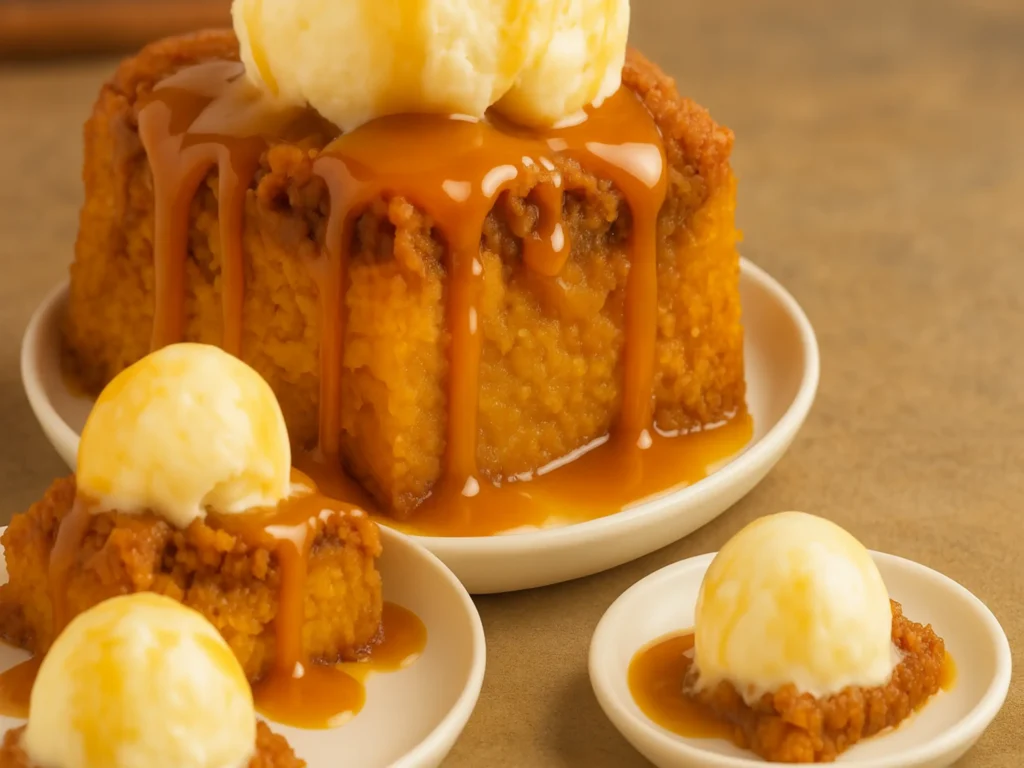
Every Thanksgiving, while the traditional pumpkin pies cooled on the counter and football commentary filled the house, there was one dessert that consistently stole the spotlight: my aunt’s legendary pumpkin dump cake. I’ll never forget the first time I tasted this magical creation—warm, perfectly spiced, and crowned with a scoop of melting vanilla ice cream. What struck me most wasn’t just how incredibly delicious it was, but how nobody even glanced at the pies afterward!
As someone who’s been perfecting family recipes for over fifteen years, I can tell you that this pumpkin dump cake has become my go-to dessert for fall gatherings. It’s ridiculously easy to make (hence the “dump” name), feeds a crowd, and delivers that perfect balance of creamy pumpkin custard and buttery cake topping that makes everyone ask for seconds. Today, I’m sharing this treasured recipe along with all the tips and tricks I’ve learned through countless batches of testing and tweaking.
Whether you’re a seasoned baker or someone who typically avoids the kitchen, this recipe will make you look like a dessert genius with minimal effort. Let’s dive into what makes this pumpkin dump cake so special and how you can master it in your own kitchen.

Pumpkin Dump Cake
This easy and delicious pumpkin dump cake has become a fall favorite, blending a rich pumpkin custard base with a buttery cake topping. Perfect for gatherings and holiday feasts.
Ingredients
Instructions
- 1Whisk together pumpkin purée, eggs, evaporated milk, sugar, vanilla, pumpkin pie spice, and cinnamon until smooth.
- 2Pour the pumpkin mixture into a greased 9×13-inch baking dish.
- 3Sprinkle dry cake mix combined with chopped pecans over the pumpkin mixture.
- 4Mix melted butter with milk and drizzle evenly over the cake mix layer.
- 5Bake at 350°F for 55-65 minutes until the top is golden and center is set.
Ingredients: The Foundation of Perfect Pumpkin Dump Cake
After making this recipe dozens of times for family gatherings, potlucks, and holiday parties, I’ve learned that the quality of your ingredients directly impacts the final result. Here’s what you’ll need and why each component matters:
Key Ingredients and Their Role
For the Pumpkin Layer:
- 2 (15 oz) cans pure pumpkin purée (not pie mix)
- 4 large eggs, room temperature
- 12 oz can evaporated milk
- 1½ cups granulated sugar
- 1 tablespoon vanilla extract
- 1 tablespoon pumpkin pie spice
- 2 teaspoons cinnamon
For the Cake Layer:
- 1 (15.25 oz) box spice cake mix (dry)
- 1½ cups chopped pecans (optional but highly recommended)
- 1 cup unsalted butter, melted
- ½ cup whole milk
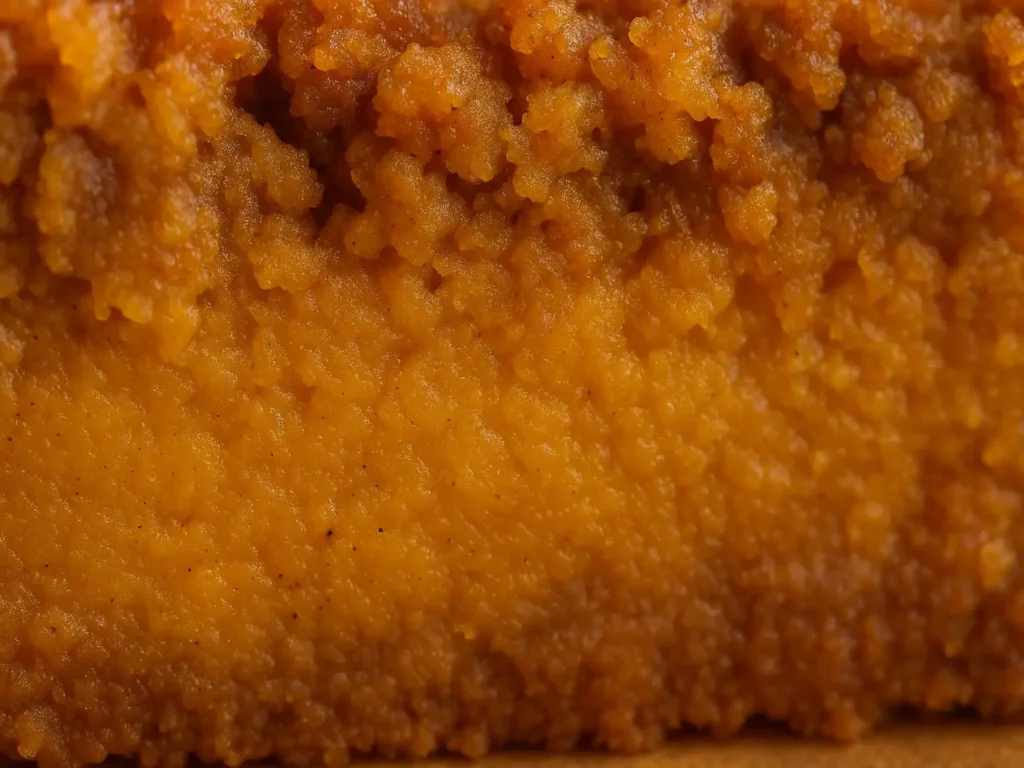
The beauty of this pumpkin dump cake lies in its layered construction. The bottom layer creates a rich, custard-like pumpkin base that’s reminiscent of pumpkin pie filling, while the top transforms into a golden, cake-like crust with delightful pockets of buttery goodness.
How to Choose High-Quality Ingredients
Through my years of recipe testing, I’ve discovered that ingredient quality can make or break this dessert. Always use pure pumpkin purée—never pumpkin pie mix, which contains added sugars and spices that will throw off the balance. I prefer Libby’s brand for its consistent texture and flavor.
For the eggs, room temperature is crucial. Cold eggs don’t incorporate as smoothly and can create a lumpy texture in your pumpkin layer. I take mine out of the refrigerator about an hour before baking, or you can place them in warm water for 5-10 minutes if you’re in a hurry.
The evaporated milk adds richness without making the dessert too heavy. Don’t substitute regular milk here—the concentrated nature of evaporated milk is essential for achieving that perfect custard-like consistency.
Substitutions That Work Well (Tried by Jowel)
Over the years, I’ve experimented with various substitutions to accommodate different dietary needs and preferences:
Dairy Alternatives: Coconut milk (canned, full-fat) works beautifully in place of evaporated milk. The slight coconut flavor actually complements the pumpkin spices wonderfully.
Sugar Substitutions: I’ve successfully used ¾ cup of maple syrup in place of the granulated sugar, though this creates a slightly softer texture and more complex flavor profile.
Nut Alternatives: If pecans aren’t available or you have nut allergies, try chopped walnuts, or omit nuts entirely. For a fun twist, I sometimes use mini marshmallows or butterscotch chips.
Cake Mix Variations: Yellow cake mix works in a pinch, though spice cake mix provides the best flavor complement to the pumpkin. I’ve also used butter cake mix with excellent results.
Preparation Steps: Expert Guidance for Perfect Results
The magic of pumpkin dump cake lies not just in its simplicity, but in understanding the technique that makes it work flawlessly every time.
How Jowel Prepares Before Cooking
Preparation is everything with this recipe. I always start by preheating my oven to 350°F and generously greasing a 9×13-inch baking dish with butter. Don’t skip the greasing step—even though this is a forgiving recipe, proper preparation prevents sticking and ensures clean slices.
I like to have all my ingredients measured and ready before I start mixing. This isn’t just about efficiency; room temperature ingredients blend more smoothly, creating a better texture in the final product. The melted butter should be warm but not hot—if it’s too hot, it can cook the eggs when you add the milk mixture.
Step-by-Step Instructions with Pro Tips
Step 1: Create the Pumpkin Base In a large mixing bowl, whisk together the pumpkin purée, eggs, evaporated milk, sugar, vanilla, pumpkin pie spice, and cinnamon until completely smooth. I use a large whisk and spend about 2-3 minutes ensuring there are no lumps. This base should be pourable and silky.
Pro tip: If you notice any lumps, strain the mixture through a fine-mesh sieve. This extra step ensures the smoothest possible texture.
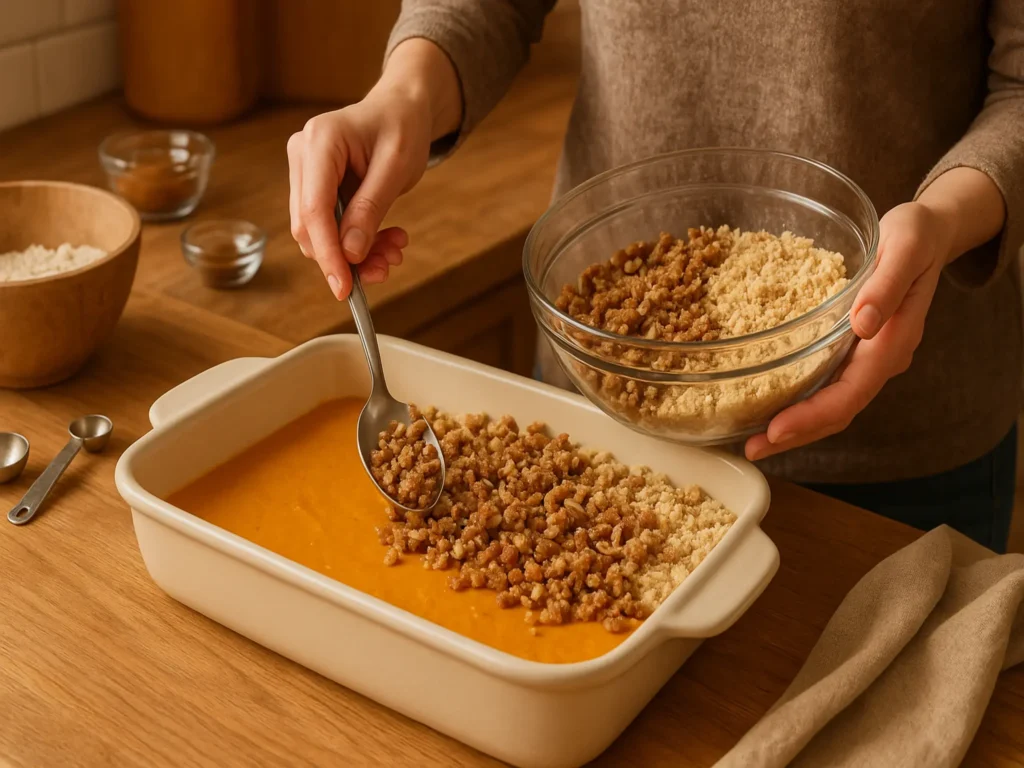
Step 2: Layer the Foundation Pour the pumpkin mixture into your prepared baking dish and spread it evenly with a spatula. The mixture should reach about halfway up the sides of the dish.
Step 3: Add the Cake Layer In a separate bowl, combine the dry cake mix with chopped pecans. Sprinkle this mixture evenly over the pumpkin layer. Don’t press it down—just let it sit naturally on top.
Pro tip: For even distribution, I like to sift the cake mix through my fingers as I sprinkle, which prevents clumping.
Step 4: The Magic Butter Drizzle Combine the melted butter with the milk in a measuring cup. Slowly pour this mixture over the cake mix layer, trying to cover as much surface area as possible. The key here is patience—pour slowly and move around the dish to ensure even coverage.
Pro tip: If you notice any dry spots after pouring, gently press them with the back of a spoon, but don’t stir. The beauty of dump cake is in the layers.
Step 5: Bake to Golden Perfection Bake for 55-65 minutes, until the top is golden brown and the center is set but still slightly jiggly. A toothpick inserted in the center should come out with just a few moist crumbs.
Common Mistakes to Avoid (From Jowel’s Real Trials)
Through my countless batches, I’ve made every mistake possible, so you don’t have to:
Overmixing the layers: The biggest mistake I see people make is stirring after adding the butter mixture. Resist this urge! The magic happens when the layers bake separately but meld together.
Using cold ingredients: Cold eggs and dairy don’t incorporate well and can create a grainy texture in the pumpkin layer.
Underbaking: It’s tempting to pull this out early when the top looks golden, but the center needs time to set properly. A slightly jiggly center is perfect—completely liquid means it needs more time.
Wrong pan size: Using a different sized pan dramatically affects cooking time and texture. Stick with the 9×13-inch for best results.
Serving & Final Touches
The presentation and serving of your pumpkin dump cake can elevate it from delicious to absolutely memorable.
Beautiful and Creative Presentation Ideas
I’ve found that this dessert looks most appealing when served slightly warm, about 15-20 minutes after coming out of the oven. The contrast between the golden-brown top and the creamy pumpkin layer beneath is naturally beautiful.
For special occasions, I like to dust the top lightly with powdered sugar just before serving. A sprig of fresh mint or a few whole pecans arranged on each portion adds an elegant touch that photographs beautifully.
Consider serving in small mason jars for individual portions—layer the pumpkin dump cake with whipped cream for a stunning parfait-style presentation that guests absolutely love.
Best Sides and Pairings (Family-Tested)
After serving this pumpkin dump cake at countless gatherings, I’ve discovered the perfect accompaniments:
Classic pairings: Vanilla ice cream is the traditional choice, and for good reason. The cold, creamy texture perfectly balances the warm, spiced cake. I also love it with freshly whipped cream sweetened with a touch of maple syrup.
Coffee connections: This dessert pairs beautifully with coffee, especially spiced varieties like chai lattes or cinnamon coffee. The warm spices complement each other perfectly.
Seasonal additions: During fall gatherings, I often serve this alongside caramel sauce for drizzling, or with a dollop of cream cheese frosting for extra richness.
Storing and Reheating Leftovers Safely
Proper storage ensures your pumpkin dump cake stays delicious for days. Cover tightly with plastic wrap or aluminum foil and refrigerate for up to 5 days. The flavors actually improve after a day or two as they meld together.
For reheating individual portions, I recommend 30-45 seconds in the microwave. For larger portions, cover with foil and warm in a 300°F oven for 10-15 minutes. The texture remains remarkably good even after refrigeration.
This dessert also freezes beautifully for up to 3 months. Wrap individual portions in plastic wrap, then aluminum foil, and thaw overnight in the refrigerator when ready to enjoy.
Frequently Asked Questions
Can I prepare this pumpkin dump cake in advance?
Absolutely! This is one of my favorite make-ahead desserts. You can prepare it completely up to 2 days in advance and store it covered in the refrigerator. I actually think it tastes better the next day as the flavors have more time to meld. Just reheat individual portions as needed, or warm the whole dish in a low oven before serving.
What’s the best way to store leftovers?
Cover your pumpkin dump cake tightly with plastic wrap or store in an airtight container in the refrigerator for up to 5 days. I’ve found that placing a piece of parchment paper directly on the surface before covering helps prevent condensation from making the top soggy. For longer storage, wrap individual portions and freeze for up to 3 months.
How can I make this recipe healthier?
I’ve experimented with several healthier variations that still taste amazing. You can substitute half the sugar with unsweetened applesauce, use sugar-free cake mix, or replace the butter with coconut oil (melted). Greek yogurt can replace some of the evaporated milk for added protein. These modifications change the texture slightly but still create a delicious dessert.
Can I double the ingredients for a party?
Yes, but use two separate 9×13 pans rather than one large pan. I learned this the hard way when a single large pan resulted in uneven cooking. Two pans also make serving easier at large gatherings. The baking time remains the same, just rotate the pans halfway through for even browning.
What’s the biggest mistake people make with this pumpkin dump cake recipe?
The most common mistake I see is stirring the layers together. The “dump” method only works if you resist the urge to mix everything together. Each layer needs to maintain its integrity during baking to create the proper texture. Also, many people overbake it—remember, a slightly jiggly center is perfect and will continue cooking from residual heat.
 DINNER
  LUNCH
LUNCH  CAKE
CAKE  BREAKFAST
 For more amazing recipes, be sure to check out our other sections to explore a variety of ideas that will enrich your cooking experience. Each section offers its own unique flavors to ensure a delightful culinary journey:
- Easy and Quick Recipes: A collection of dishes that guarantee delicious meals with minimal effort and time.
- Healthy Recipes: Discover healthy and delicious options that fit your lifestyle.
- Desserts: A diverse selection of sweets that will add a special touch of sweetness to your table.
- Lunch Recipes: Tasty lunch ideas that you can easily prepare to delight your family.
- Dinner Recipes: Delicious and easy-to-make recipes that will make your dinner a memorable occasion.
Conclusion
This pumpkin dump cake recipe has been a cornerstone of my fall baking repertoire for years, and I’m confident it will become a treasured addition to your recipe collection too. The combination of ease, flavor, and crowd-pleasing appeal makes it perfect for everything from casual family dinners to holiday entertaining.
What I love most about this recipe is how it brings people together. There’s something magical about watching faces light up with that first bite—the surprise at how something so simple can taste so extraordinary. It’s become more than just a dessert in our family; it’s a tradition that creates memories and starts conversations.
I encourage you to try this recipe and make it your own. Maybe you’ll add your favorite nuts, experiment with different spice combinations, or find your own perfect serving accompaniment. Whatever variations you discover, I’d love to hear about them in the comments below.
Don’t forget to share photos of your pumpkin dump cake creations—there’s nothing I enjoy more than seeing how others bring this recipe to life in their own kitchens. Happy baking!