Introduction
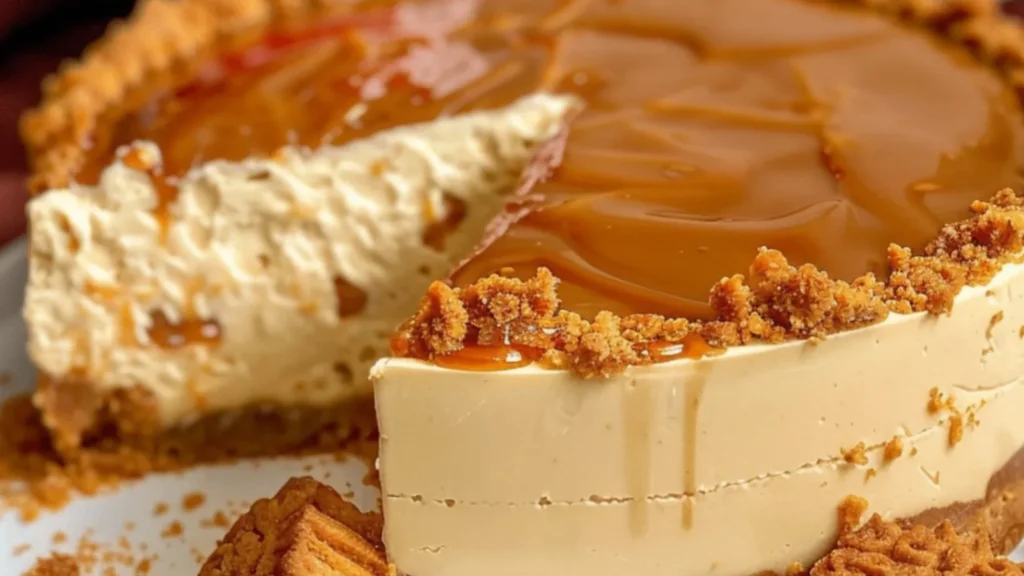
Have you ever taken a bite of something and instantly felt like it gets you? This no-bake Biscoff cheesecake is exactly that kind of dessert – a harmonious blend of creamy, spiced comfort that will transport you to dessert heaven with every spoonful. With its buttery cookie base, velvety smooth filling, and that unmistakable caramelized cookie butter flavor, this cheesecake doesn’t just satisfy your sweet tooth – it creates memories.
The best part? You only need 5 core ingredients to create this masterpiece, and there’s absolutely no baking required. Perfect for warm summer days when turning on the oven feels like a punishment, or for those moments when you need an impressive dessert without the fuss. This Biscoff cheesecake is dangerously delicious and surprisingly simple to make.
Table of Contents
What Makes This Biscoff Cheesecake Special?
What sets this Biscoff cheesecake apart from other no-bake desserts is the distinctive flavor of Lotus Biscoff. These spiced shortcrust biscuits, with their notes of caramel, cinnamon, and other warm spices, have developed a cult following worldwide – and for good reason. When transformed into a spread and incorporated into a cheesecake, the result is nothing short of magical.
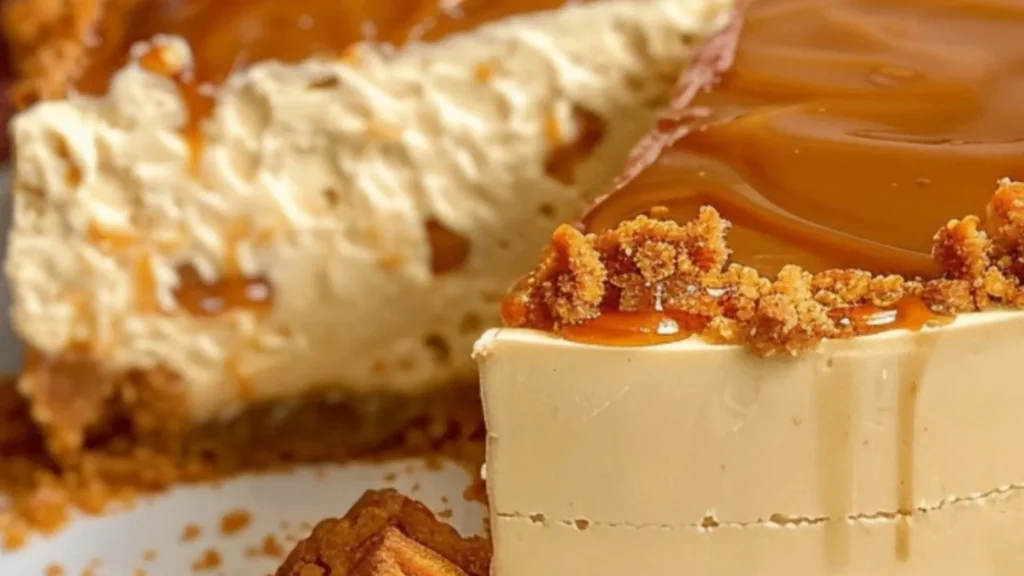
The contrast between the crunchy base, the silky-smooth cream cheese filling, and the glossy Biscoff topping creates a textural symphony that keeps you coming back for “just one more slice.” Whether you’re hosting a dinner party or simply treating yourself after a long week, this Biscoff cheesecake promises to impress.
Ingredients
For the Base:
- 200g (7oz) Lotus Biscoff biscuits, crushed finely
- 80g (2.8oz) unsalted butter, melted
For the Filling:
- 300ml (10 fl oz) double cream (heavy cream)
- 400g (14oz) full-fat cream cheese, at room temperature
- 200g (7oz) Biscoff spread (smooth variety)
For the Topping:
- 150g (5.3oz) Biscoff spread, melted until smooth
- 50g (1.75oz) Biscoff biscuits, crushed
Equipment Needed
- 20cm (8-inch) springform cake tin
- Food processor or rolling pin for crushing biscuits
- Mixing bowls
- Electric hand mixer or stand mixer (recommended)
- Spatula
- Microwave or small saucepan (for melting)
- Measuring cups and spoons
- Refrigerator
Preparation Time
- Prep Time: 30 minutes
- Chilling Time: Minimum 4 hours (preferably overnight)
- Total Time: 4 hours 30 minutes (or overnight)
- Difficulty Level: Easy
- Servings: 8-10 slices

Biscoff Cheesecake Magic – Just 5 Ingredients
Ingredients
- 200 g 7oz Lotus Biscoff biscuits, crushed finely
- 80 g 2.8oz unsalted butter, melted
- 300 ml 10 fl oz double cream (heavy cream)
- 400 g 14oz full-fat cream cheese, at room temperature
- 200 g 7oz Biscoff spread (smooth variety)
- 150 g 5.3oz Biscoff spread, melted until smooth (for topping)
- 50 g 1.75oz Biscoff biscuits, crushed (for decoration)
Step-by-Step Instructions
Creating the Perfect Biscoff Base
- Prepare your tin: Lightly grease the sides of your springform tin with butter and line the base with parchment paper for easy removal later.
- Crush the biscuits: Place the Biscoff biscuits in a food processor and pulse until you have fine crumbs. Alternatively, place the biscuits in a sealed plastic bag and crush them with a rolling pin. The finer the crumbs, the better your base will hold together.
- Mix with butter: Transfer the crushed biscuits to a mixing bowl and pour in the melted butter. Stir thoroughly until the mixture resembles wet sand and all crumbs are evenly coated with butter.
- Form the base: Tip the mixture into your prepared springform tin. Using the back of a spoon or the bottom of a glass, press the mixture firmly and evenly across the base of the tin. Take your time with this step – a well-compacted base will hold together better when sliced.
- Chill: Place the tin in the refrigerator for at least 30 minutes to allow the base to set while you prepare the filling.
Creating the Creamy Biscoff Filling
- Prepare the cream cheese: In a large mixing bowl, beat the room-temperature cream cheese until smooth and free of lumps. This is easier if the cream cheese has properly softened at room temperature for at least 30 minutes.
- Add the Biscoff spread: Add the Biscoff spread to the cream cheese and beat until fully incorporated and smooth. Make sure to scrape down the sides of the bowl to ensure everything is well mixed.
- Whip the cream: In a separate bowl, whip the double (heavy) cream until it starts to thicken and form soft peaks. Be careful not to over-whip, as this can make your filling too stiff.
- Combine: Gently fold the whipped cream into the cream cheese and Biscoff mixture using a spatula. Use a gentle folding motion to maintain as much air as possible in the mixture, which will help create that perfect light yet creamy texture.
- Transfer to tin: Remove the chilled base from the refrigerator. Spoon the filling mixture onto the base and use a spatula to spread it evenly, creating a smooth, level surface. Tap the tin gently on the counter a few times to remove any large air bubbles.
- Chill thoroughly: Return the tin to the refrigerator and allow the cheesecake to set for at least 3-4 hours. For best results, leave it overnight – this longer chilling time allows the flavors to develop fully and ensures the perfect texture.
Adding the Spectacular Biscoff Topping
- Melt the Biscoff spread: About an hour before serving, gently melt the Biscoff spread for the topping. You can do this in a microwave using 15-second bursts and stirring in between, or in a small saucepan over very low heat. The spread should be smooth and pourable, but not hot.
- Top the cheesecake: Carefully pour the melted Biscoff spread over the set cheesecake filling. Working quickly but gently, use the back of a spoon or an offset spatula to spread it evenly across the surface, going right to the edges.
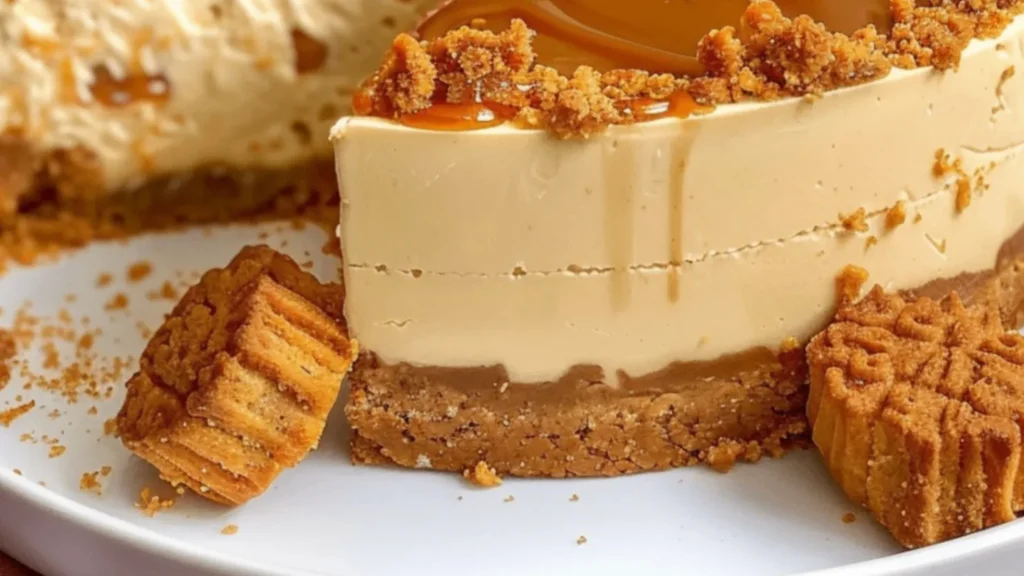
- Add the finishing touch: Before the topping sets, sprinkle the crushed Biscoff biscuits around the edge of the cheesecake to create a decorative border. Alternatively, you can sprinkle them across the entire surface for added texture and visual appeal.
- Final set: Return the cheesecake to the refrigerator for at least another hour to allow the topping to set. This will make slicing cleaner and easier.
Serving Suggestions
For the ultimate Biscoff experience, serve your cheesecake with one or more of these delicious accompaniments:
- A drizzle of warm Biscoff spread
- A dollop of freshly whipped cream
- A scoop of vanilla ice cream
- A dusting of cinnamon
- Fresh berries for a touch of tartness to balance the sweetness
- A sprinkle of sea salt flakes to enhance the caramel notes
When it’s time to slice, dip a sharp knife in hot water, wipe it dry, and cut clean slices. Repeat this process between each slice for picture-perfect servings.
Storage Instructions
This Biscoff cheesecake can be stored in the refrigerator for up to 3 days. Keep it covered with plastic wrap or in an airtight container to prevent it from absorbing other flavors from the fridge.
If you want to prepare this dessert further in advance, you can freeze it:
- Allow the cheesecake to set completely in the refrigerator
- Remove from the springform tin and place on a freezer-safe plate or board
- Freeze uncovered for 1-2 hours until firm
- Wrap tightly in plastic wrap, followed by aluminum foil
- Freeze for up to 3 months
- Thaw overnight in the refrigerator before serving
Variations to Try
While the classic recipe is perfection, here are some delicious variations to experiment with:
Chocolate Biscoff Cheesecake
Add 100g of melted and cooled dark chocolate to the filling mixture for a chocolate-lover’s dream.
Biscoff and Salted Caramel
Drizzle salted caramel sauce between the base and filling for an extra layer of indulgence.
Biscoff Cheesecake Jars
Layer the base, filling, and topping in individual glass jars for an elegant presentation at dinner parties.
Mini Biscoff Cheesecakes
Use a muffin tin lined with paper cases to create individual mini cheesecakes – perfect for portion control (if you can stop at just one!).
White Chocolate Biscoff Cheesecake
Add 100g of melted white chocolate to the filling for an extra creamy texture and complementary flavor.
Troubleshooting Tips
Problem: My cheesecake filling is too runny.
- Solution: Make sure you’re using full-fat cream cheese and that you’ve whipped the cream to soft peaks. If the mixture is still too soft, refrigerate it for 30 minutes before transferring to the tin.
Problem: My base is crumbly and falls apart when sliced.
- Solution: Ensure you’ve used enough butter and pressed the mixture firmly into the tin. Chilling the base thoroughly before adding the filling also helps it set properly.
Problem: The top layer of Biscoff spread is too hard to cut through neatly.
- Solution: Allow the cheesecake to sit at room temperature for 10-15 minutes before slicing, and use a knife dipped in hot water to cut through.
Problem: Air bubbles or cracks on the surface.
- Solution: Tap the tin gently on the counter a few times after adding the filling to release any trapped air bubbles.
Nutritional Information (Approximate Per Slice, Based on 10 Servings)
- Calories: 520 kcal
- Fat: 38g
- Saturated Fat: 22g
- Carbohydrates: 42g
- Sugar: 28g
- Protein: 5g
- Fiber: 1g
- Sodium: 230mg
FAQs About This Biscoff Cheesecake Recipe
Q: Can I use light cream cheese instead of full-fat? A: While you can use light cream cheese, the texture may be slightly less rich and the cheesecake may not set as firmly. If using light cream cheese, consider adding 1 tablespoon of gelatin (bloomed and dissolved) to help it set.
Q: I can’t find Biscoff spread. What can I use instead? A: Any cookie butter spread will work, or you can try using smooth peanut butter with 2 teaspoons of cinnamon and 2 tablespoons of brown sugar added for a similar warm, spiced flavor profile.
Q: Can I make this recipe dairy-free? A: Yes! Use dairy-free cream cheese, plant-based whipping cream, and plant-based butter. Just ensure they’re capable of setting firmly when chilled.
Q: How far in advance can I make this cheesecake? A: You can make this cheesecake up to 2 days in advance and keep it refrigerated. Add the Biscoff topping and crushed biscuits on the day of serving for the freshest appearance.
Q: Why did my filling curdle or become grainy? A: This usually happens if the cream cheese is too cold when mixing. Always let it come to room temperature before starting.
 DINNER
 LUNCH
LUNCH CAKE
CAKE BREAKFAST
For more amazing recipes, be sure to check out our other sections to explore a variety of ideas that will enrich your cooking experience. Each section offers its own unique flavors to ensure a delightful culinary journey:
- Easy and Quick Recipes: A collection of dishes that guarantee delicious meals with minimal effort and time.
- Healthy Recipes: Discover healthy and delicious options that fit your lifestyle.
- Desserts: A diverse selection of sweets that will add a special touch of sweetness to your table.
- Lunch Recipes: Tasty lunch ideas that you can easily prepare to delight your family.
- Dinner Recipes: Delicious and easy-to-make recipes that will make your dinner a memorable occasion.
Why This No-Bake Biscoff Cheesecake Will Become Your Go-To Dessert
This no-bake Biscoff cheesecake isn’t just a dessert; it’s a crowd-pleasing masterpiece that combines simplicity with spectacular flavor. The contrast between the crunchy, spiced base and the silky, creamy filling creates an irresistible texture that will have everyone requesting the recipe.
What makes this dessert truly special is its versatility. It’s elegant enough for special occasions yet simple enough for weeknight treats. The no-bake aspect means it’s perfect year-round, whether you’re avoiding heating the kitchen in summer or need to free up oven space during holiday cooking.
The distinctive caramelized flavor of Biscoff runs through every layer, creating a harmonious dessert that feels both nostalgic and sophisticated. It’s the kind of recipe that becomes a signature dish – the one friends and family specifically request when you ask what you can bring to gatherings.
So whether you’re a seasoned baker or a novice in the kitchen, this no-bake Biscoff cheesecake promises foolproof results and guaranteed smiles. Save this recipe – it’s destined to become a favorite in your dessert repertoire
Conclusion
So simple, yet so incredibly delicious – this no-bake Biscoff cheesecake is the kind of dessert that creates moments of pure joy with every bite. The combination of that iconic spiced cookie flavor in multiple forms – the crunchy base, the creamy filling, and the glossy topping – creates a dessert experience that’s greater than the sum of its parts.
Whether you’re making it for a special occasion or simply because you deserve a treat, this cheesecake is guaranteed to impress. Its simplicity makes it accessible to bakers of all skill levels, while the results are worthy of the finest dessert table.
Remember to save this recipe – it’s destined to become a regular request from friends and family. A slice of this Biscoff cheesecake magic is more than just dessert; it’s a moment of sweet bliss in an otherwise busy day.
Have you tried making this Biscoff cheesecake yet? We’d love to hear about your experience in the comments below!